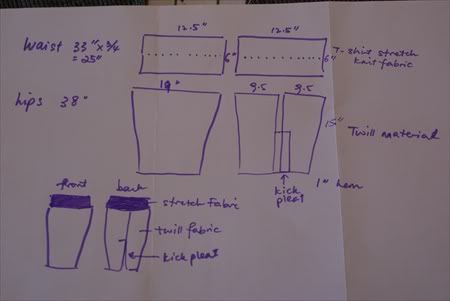
I wanted a quick pencil skirt with a slit-no zippers or closures-something with a stretch waistband that I can wear whether pregnant or not. I had some black stretch fabric lying around that I had bought from some opshop in some distant past, and some grey lining material that I was given. I quickly measured my waist and my hips-33" and 38". It is depressing to realise that I'll never be a 24" again.
My plan was to just measure and cut on the cloth without any pattern. I wanted a rectangle of black stretch fabric about 3/4 of my waist measurement for the waistband, about 6 inches high and doubled over for strength and stability as per diagram below.
[caption id="" align="alignnone" width="450" caption="The blueprint"]
 [/caption]
The waistband would go from my natural waist to my hipline, and the twill fabric panels will start from the hip. That way I needn't add darts for the lower panels, since it would fit over the widest part of my hips without any closures. The lower panels are cut simply-my hips were 36+2 inches wearing ease=38", so the front panel was 19" wide with half inch seam allowances, and the back panels 9.5" with seam allowances. The front and back panels taper downwards to 17inches and 8.5 inches in width respectively. The back panels I added about 1.5 inches in width starting from the middle centre back line for a split.
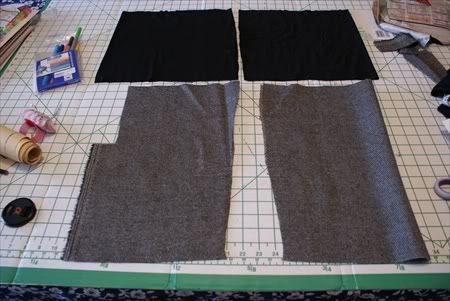
[caption id="" align="alignnone" width="450" caption="The cut pieces"]
 [/caption]
I also cut a lining from the above twill fabric pieces.
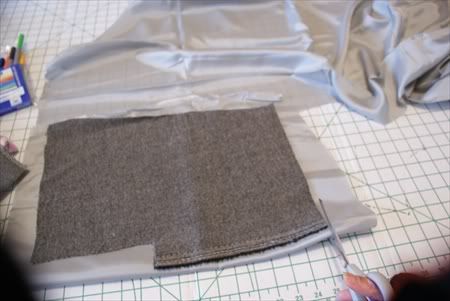
[caption id="" align="alignnone" width="450" caption="Cutting into the lining"]
 [/caption]
See Ma! No pins! I was really doing this on the fly. I was more excited about this skirt than the Vogue inspired one now-even though that one is all cut out.
First thing was to overlock all the edges.Most sewing machines have an overcasting stitch if you don't have an overlocker, although if you do plan on sewing garments, you can't beat an overlocker for a professional finish. I love mine.
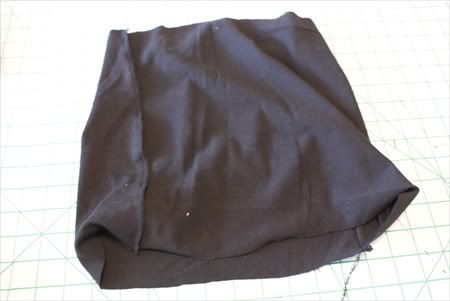
To make the waistband, join the shortest edges of the two pieces together and form a tube. Use a narrow zigzag stitch, or overlock.
[caption id="" align="alignnone" width="450" caption="Form a tube with the stretch fabric"]
 [/caption]
Fold the tube in half lengthwise, so that you have a double layer going all around your waist.
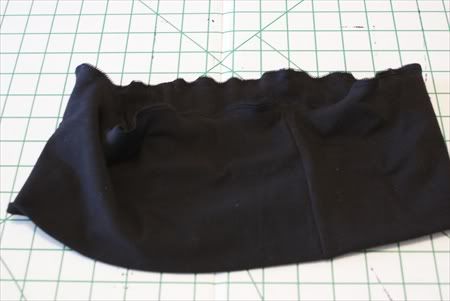
[caption id="" align="alignnone" width="450" caption="Waistband doubled up"]
 [/caption]
The back slit needs to be done first. I neglected to take pictures-but here's a walkthrough. Sew down the back seam as usual, but at the start of the outside corner, change the stitches to the largest straight stitch. Press open, and sew around the slit. Use a seam ripper and unpick the large stitchs up to the outside corner where the slit starts.
Now it's just the simple matter of joining the two side seams together.
Repeat the whole process with the lining.
Attach the skirt to the waistband-pin at quarterly intervals, and stretch the waistband to fit the skirt as you sew. Use a narrow zigzag stitch. Now attach the lining with the same process, just be sure that the right side of the lining faces the inside. Use a blindhem stitch to hem the skirt and the lining, making sure that the lining is hemmed higher so that you don't see the lining from the outside. Handsew the lining slit to the skirt slit.
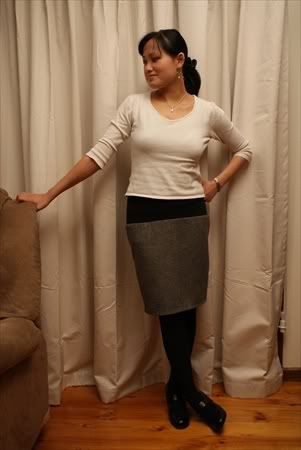
[caption id="" align="alignnone" width="301" caption="Quick pencil skirt"]
 [/caption]
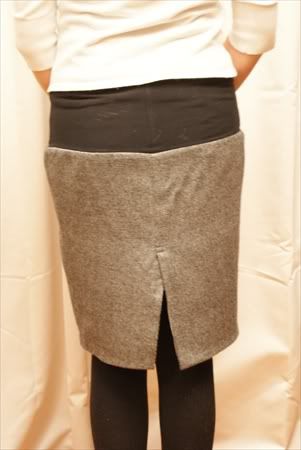
[caption id="" align="alignnone" width="301" caption="Back view"]
 [/caption]
Hmm..I didn't do a very good job on the pressing. But I guess it's not wool, since it didn't shrink when I steamed it, and it's not wrinkle resistant.
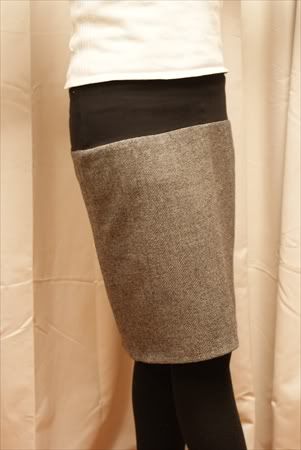
[caption id="" align="alignnone" width="301" caption="Closeup view"]
 [/caption]
All in all, I'm very pleased with this skirt. It was a very quick job, and I spent only a dollar on the material. It will always fit me, and the pencil skirt is very flattering. It is also great for maternity wear too!
Go home and make one today!
No comments:
Post a Comment
I love hearing from you! Please leave your comments here: