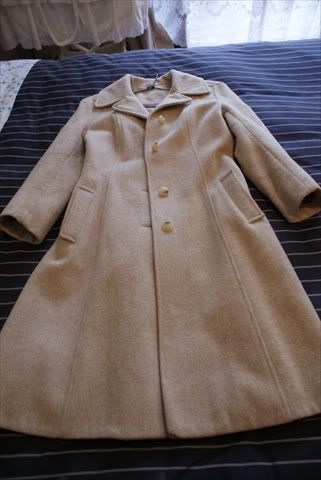
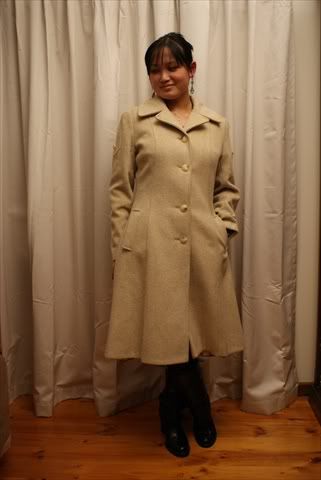
[caption id="" align="alignnone" width="321" caption="Vintage Camel Coat"]
 [/caption]
The coat is cut in a very flattering princess style, with topstitching, welt pockets, and a military-looking sleeve head.
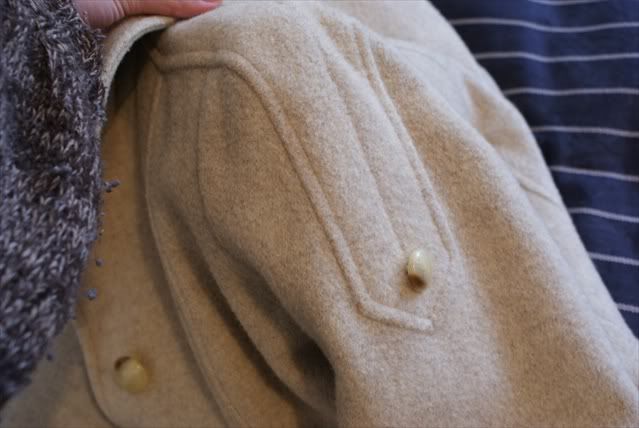
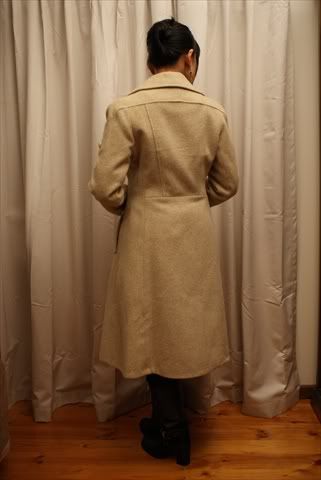
[caption id="" align="alignnone" width="639" caption="Interesting sleevehead"]
 [/caption]
Being interested in patternmaking myself, I was fascinated with the cut of the sleeve, which is half set-in sleeve, and half whatchacallit. The whole cut of the coat was very feminine. You wouldn't be able to get anything like it at the shops today. I especially love the way the skirt flares out.
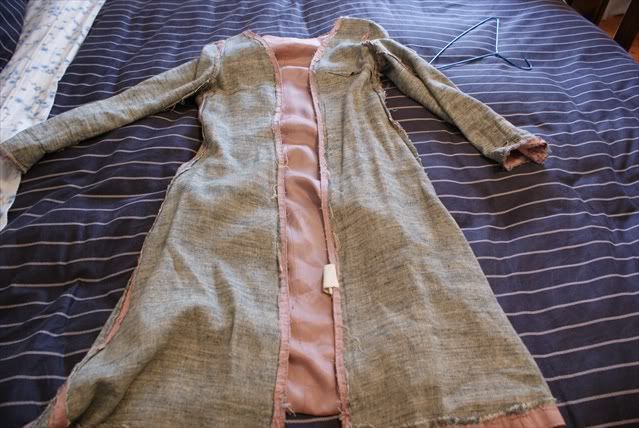
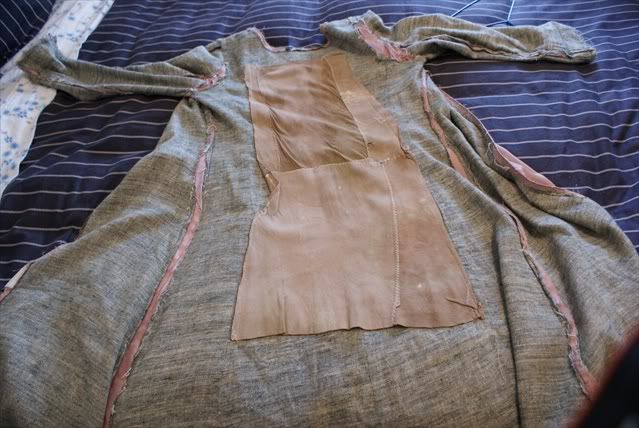
However, the lining was in pitiful state. It was moth-eaten, ripped under the sleeves, threadbare, stained and torn in a few places. And it was a really awful pink typical of that vintage. Not to mention that it smelled something horrible.
But when I tried it on, I fell in love with the way it looked on me-it fitted me exactly, and I didn't have that colour coat in my collection. The price tag on it was $35-which was a little high for an opshop, and I hesitated when I thought about the lining. But I convinced myself that it could be easily relined. The clincher came when I realised that it had a purple tag and it was half price day for purple tags! My parents were with me at the time and my dad offered to pay for it. So sweet of him. They both said the coat looked beautiful. And you don't argue with your parents on that one.
So I got back home and sat on it for a week and studied it inside and out. And proceeded to rip the lining out and apart.
[caption id="" align="alignnone" width="639" caption="Lining front"]
 [/caption]
[caption id="" align="alignnone" width="639" caption="Lining back"]
 [/caption]
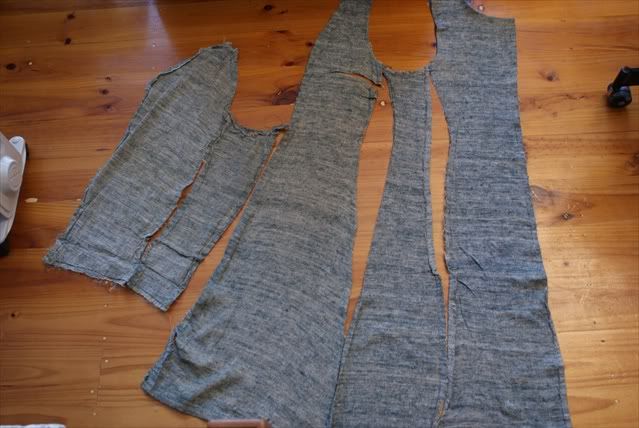
As you can see, the lining has an underlining made of cotton flannel, and the back has a rectangle of suede sewn onto it. I took pictures of how the lining inside was constructed and attached and made notes so as to guide me later. My plan was to rip one side of the lining apart at the seams, and leave the other side intact, then use the lining pieces as a pattern for the new lining.
[caption id="" align="alignnone" width="639" caption="Lining pattern pieces"]
 [/caption]
The lining pieces had to be ironed flat first. And I had to measure the seam allowance on it to determine how much to sew on the new lining.
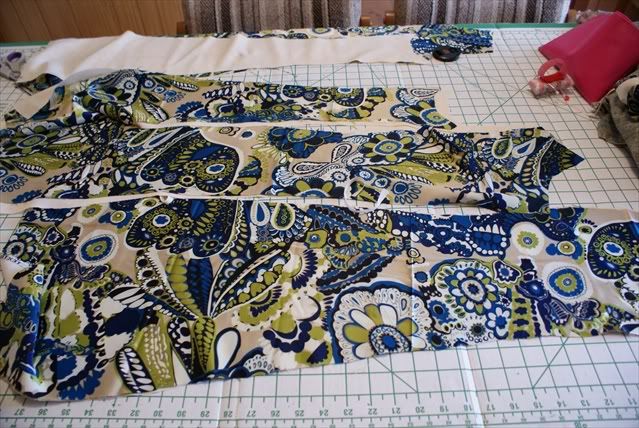
I was set on a really funky lining, and had in mind some loud polyester fabric leftover from a maternity dress, which I got from the bargain table at Spotlight.
[caption id="" align="alignnone" width="556" caption="Print maternity dress (See the Wyld Maternity Collection 2009 here)"]
 [/caption]
To underline it, I used some tan wool crepe in my stash (which again came from an opshop). It wasn't an attractive colour, and had some holes in it, but being an underlining, it didn't matter too much. I but both lining and underlining using the old lining pattern pieces.
[caption id="" align="alignnone" width="639" caption="New lining pieces"]
 [/caption]
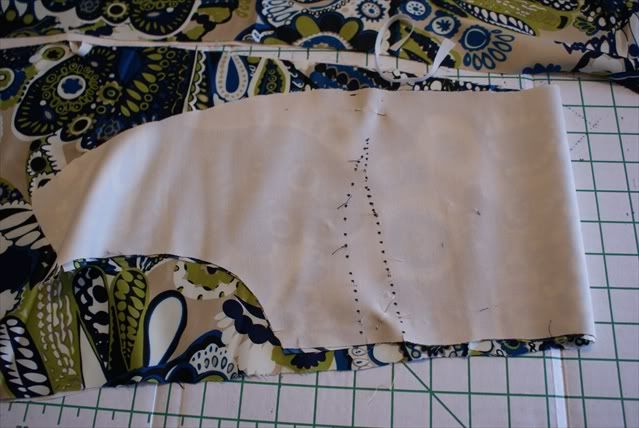
I made sure to mark the darks on both fabrics, then sewed the outline of the darts through both fabric layers.
[caption id="" align="alignnone" width="639" caption="Dart outline"]
 [/caption]
I also sewed around the edges of all the lining and underlining pieces together, treating them both as a single layer from then on. For the back panels however, I joined the centre back seam of both fabrics together, but before sewing the edges of both fabrics, I sewed the suede rectangle onto the underlining. Then I sewed the edges of the lining and underlining together, treating it as a single layer from then on. I then proceed to join all the pieces together, as well as attaching the sleeves.
Now comes the big part-joining the lining to the coat. I sewed the lining edge to the coat facing, right sides together, all around from the middle of the collar down one side, and then down the other. This ensures that you don't end up with one side of the lining longer or shorter than the other. It also means that the middle of the collar of the lining and the coat will match up. Now all that is needed is the hemming of sleeve and hem.
The sleeves were 1 1/2 inches too short-so I lengthened it. Luckily the hem inside was quite generous which allowed me to do that. Otherwise it would have looked a bit funny on me. I had cut the sleeve lining longer to accomodate that alteration.
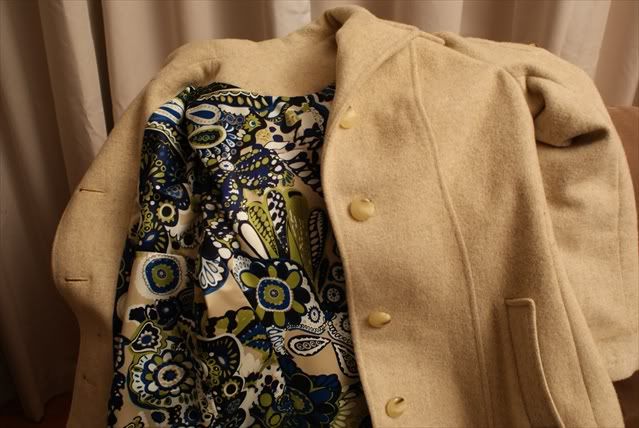
And this is the finished product.
[caption id="" align="alignnone" width="639" caption="New lining"]
 [/caption]
[caption id="" align="alignnone" width="321" caption="Front view"]
 [/caption]
[caption id="" align="alignnone" width="321" caption="Inside view"]
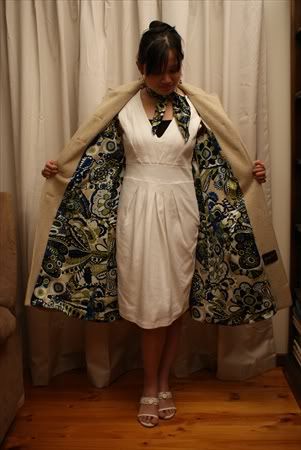 [/caption]
With the leftovers of the print lining, I made a square scarf to match (edges finished with a rolled hem on the overlocker) and a hair scrunchy.
I sent the coat to be drycleaned before I wore it. And I have worn it many many times over the last two months. I love this coat, and especially the lining. I feel like I've got a wonderful secret hidden under a demure coat. The loud print sings to me and to anyone I've shown it to.
Take note however that if you remove the labels from the old lining to insert the care instructions for the coat into the new lining, because the dry cleaners might make you sign a waiver/indemnity in case of possible damage due to there being no care label.
This was a quick project and very satisfying. And it's not that hard to do. So next time you see a beautiful coat with an old lining, rescue it and give it an internal facelift.
Nice job!
ReplyDeleteit's great that u use the left over fabric cloth for the lining.After all, u get a new coat!!
ReplyDeleteThank you SO much for this! It never occurred to me that this could be done! I'm going to fix my favorite coat now!
ReplyDeleteI discover your blog few weeks ago... I'm impressed with your work ! Your coat is so nice and I love the inside fabric. (By the way I'm sorry if my english is not good... I am a french canadian, from Québec...) Continue your good work !
ReplyDeleteHello Isa-had a quick read of your blog (not that I can read French) and loved the things you've sewn up too! Nice to 'meet' you!
ReplyDeleteThank you Belinda!
ReplyDeleteI know! I love being able to sew! Thanks for reading and leaving a comment San!
ReplyDeleteHello Emily, I'm glad to be a source of inspiration!
ReplyDeleteGorgeous remodel :O) Love the little surprise inside and that it came from a preexisting dress!! Great joB!
ReplyDeletehow absolutely, flabberghastingly amazing!
ReplyDeleteWhat a terrific renovation! bravo!
ReplyDeleteTas, excellent! You are so good at it. It's not easy. You are so confident & so patient! I'm so proud of you. Lov,Mummy
ReplyDeleteJust brilliant - looks a million bucks!
ReplyDeleteWonderful relining job! And now I don't feel so alone in my ever-growing collection of vintage outerwear. I'm only wishing I had a coat that needed new lining.
ReplyDeleteFantastic!!
ReplyDeleteJoyce you are a wonder! One day I'm going to have sewing lessons with you :)
ReplyDelete