A few weeks ago PatternReview.com held a giveaway of Gwynhug's Fabric Reference Cards. There were to be 2 winners from the US, and two international winners. I entered my comment and they picked me as one of the winners! See here for the winner announcement.
Yay! Finally I actually won something that I want and need. I've never had much luck with competitions before.
When I first read about the cards, I really really wanted to get a set, but never got around to it. They are great because if you're like me, collecting pretty fabric can become an expensive habit, and is compounded by the fact that I never really know how much fabric I'm going to need and for what. I always estimate but err on the generous side so I end up spending more money than I need to, since I don't shop with a pattern in mind. I'm taking these with me next time I go to Spotlight. And I'll flash my cool cards around shamelessly.
These fabric reference cards are the result of hundreds of hours of research into fabric yardage tables on patterns, and divided into a) women's, (b) women's plus sizes, (c) men's, (d) baby & toddler, and (e) children's garments. I chose set A of course. The cards come in either imperial or metric measurements.
I'm really happy I'm getting these!
Wednesday, February 29, 2012
Tuesday, February 28, 2012
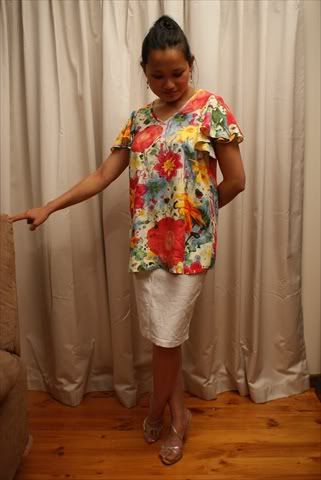
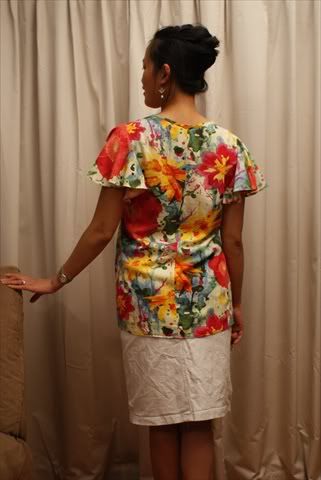
Floral Smock Top
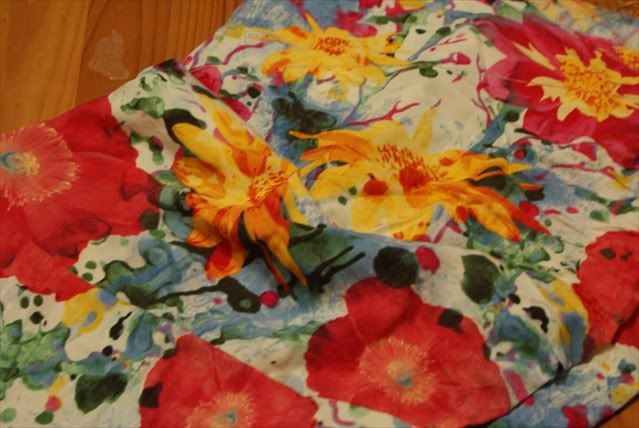
I made a top!!!! Spotlight had a fabric sale ages ago and they had this really pretty floral print in rayon.
I fell utterly in love with the print, but especially the feel of the rayon fabric. I always thought that rayon was a man-made fibre, but I was wrong-it's actually made of cellulose, a natural fibre from plants, and created as a cheaper alternative to silk. It is so light and breezy, breathes really well, very comfortable,and feels like a lightweight, really drapey silky cotton. When I first saw this fabric I persuaded myself that I did not need it. But I came back and got it after seeing it on the bolt a few times. I knew exactly what I would make with it, but after buying my 1.2 metres of it, I never got around to making anything for months and months (hint: I bought it last summer and this summer is almost at it's end!)
I wanted something really simple, no closures, minimal darts, no facings. I wanted it to be comfy, yet easy to wear and very feminine. So, I dug out my self-drafted maternity smock pattern. Even though it was drafted with a baby bump allowance, it is great as a loose smock top. And I love the version with the circular drape sleeves. This will be top number 4 that I've made with this pattern. See the other three in the link above.
Wyld Man was away for 5 days in Melbourne a couple of weekends ago, so I decided against feeling lonely and neglected (which I was for a couple of days-after the babies go to bed at 7pm, there's no one to talk to!) and sat down and cut and sewed everything in one night.
I used my brand new rotary cutter and self-healing mat to cut out. It is so quick! I don't think I'll be going back to scissors!
Make all the appropriate markings for darts and notches.
I sewed the back darts first.
Then I decided to use a french seam for this top-my overlocker has been acting up and wasn't available, and I wanted a neat finish inside. This is the first time I've use a french seam. I feel so chic! It looks really neat as it encloses all the raw edges. I prefer it to overlocking the edges-but I wouldn't use it on a thicker fabric.
To sew a flat-fell seam, put wrong sides of fabric together and sew 3/8 inches from the edge. I used this seam finish on the back centre seam, side seams and the shoulder seams.
Now press the seam open and flat, then press to one side, turn it over so that right sides are together and stitch 1/4 inch from the edge. Make sure the raw edge has been neatly trimmed and you don't catch any threads. So because my seam allowance was 5/8 inch, sewing the first seam at 3/8inch and the second seam at 1/4 inch makes 5/8 inch! I didn't figure that out till recently-duh! Press the seam to one side.
I'll show you the french seam later.
Now to hem the sleeves and the bottom of the main garment. For this fabric, which is terribly ravelly, I zig zag the edge, turn and zig zag again, then turn under again, and finally topstitch for a neat finish.
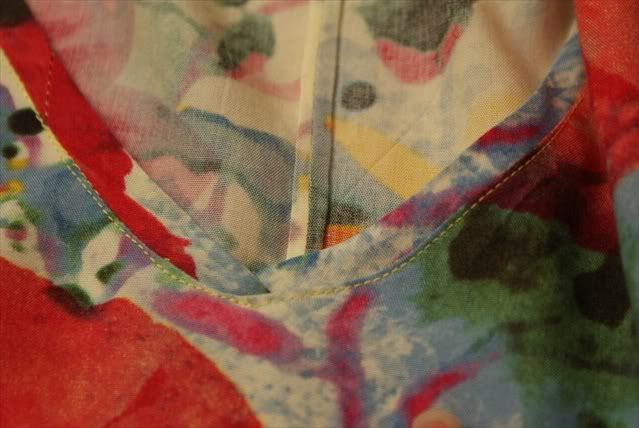
Now for the neckline. First we join the bias strips, making sure it is longer than the neckline. Then press it in half, stretching the bias as you press. It doesn't hurt to shape the bias binding in a curve too.
See the pretty little french seam? So neat! Now we stitch 5/8 inch all around the neckline-staystitching it to prevent the neckline stretching. This is because the neckline is cut curved which means it is off grain and on the bias and handling it will stretch the fabric, distorting the neckline.
Sew the middle of the bias binding but stop 1 inch from either side of the centre front dot. Press the bias binding so that the folded edge is pointing north.
Woohoo! Done.
Monday, February 13, 2012
Baby Sleep and Sleeping Bags
Dear readers,
I'm back! Finally, after having my second baby, dealing with some sleep and feeding issues, almost eight months later I'm back to post something. Been itching to sew for months, but my little Hippo (that's the Little Wyld One #2) has kept me busy! We call him the little Hungry Hippo because when he was born he ate and grew a lot. Now he's the Hefty Hippo. He's almost as big and heavy as the Little Wyld One, whom I'm gonna call Monkey from now on. Well, Monkey is almost 2-next week in fact. Sigh, have to get busy planning something.
I haven't been able to sew for a few months. But when Hippo wasn't sleeping well without being wrapped, I made some baby sleeping bags on the fly. I liked the ones where the bags don't have armholes in them, but they are very expensive to buy, and I'd need several. Hippo does not sleep well with his arms free, but he was getting too big to be wrapped anymore. So being quite desperate I drafted my own pattern and made 4 sleeping bags at once.
Sorry, I don't have a tutorial-I was in a rush and just wanted to get one done. I used soft cotton knits from my stash, and long vintage zips from opshops.
One of these days, I'll make a PDF pattern and post it here if anybody is interested.
Speaking of PDF patterns, a friend asked that I make a PDF of my maternity skirt pattern to sell. I never thought of doing it before, and I wonder if there would be a market for it. I have no idea where to start or what sizes to offer or how much to sell it for. But if anybody has any thoughts about it, please leave a comment!
I'll leave you with a pic of my Little Wyld Men.
I'll leave you with a pic of my Little Wyld Men.
Subscribe to:
Comments (Atom)


