I had a very productive day today. Did some laundry, some ironing, some tidying...and some gladwrapping. What did I gladwrap? Me. You see, in the sewing world, it is very useful to have dressforms to pin things on because you want to test the fit and hang of a garment. However, dressforms are very expensive, and sewing test garments all the time is rather time-consuming. The answer? Gladwrap yourself. The idea is to wrap yourself up in glad wrap with a few layers, mark the seam lines and darts and centre lines, cut off the wrap, lay it flat , and then use that as YOUR pattern for making garments to your measurements. So much faster. So that was what I've been up to today. I made a friend online who does patternmaking at TAFE, and we made a date to gladwrap ourselves today. So Mandy came over and we set to work. I came across this idea here.
Here's a walkthrough: You need Gladwrap or any sort of clingwrap, a tight t-shirt, a permanent marker pen, scissors, brown tape, string and a patient friend.
First you need to tape the waistline
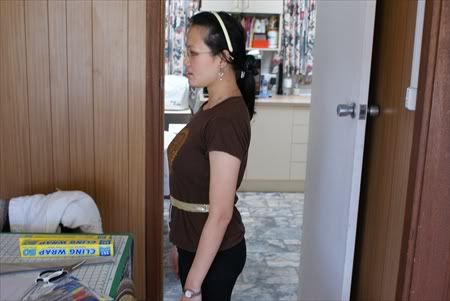
I tied some string around my natural waist and used packing tape on it.
Then you need to mark the centre front line with tape.

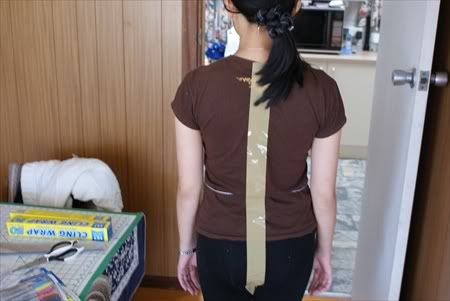
Sorry for the fuzzy picture. The centre front needs to be marked with tape. Same with the back.
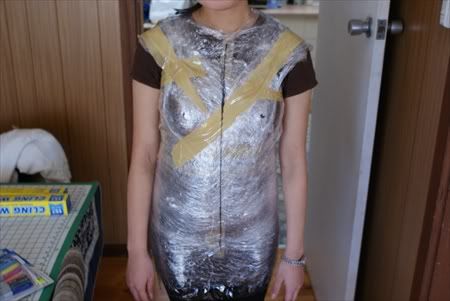
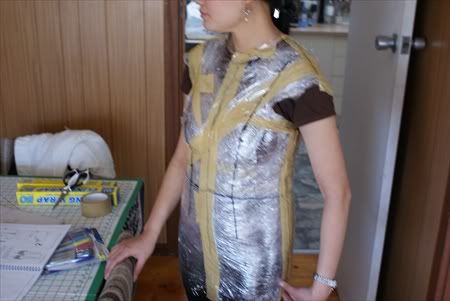
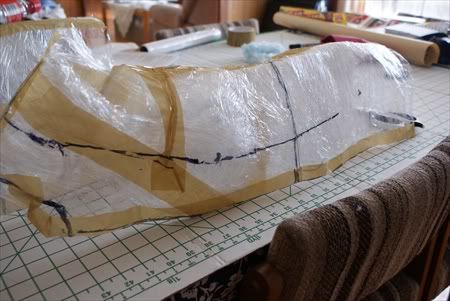
Start wrapping around the whole body down to the hip and over the neck and shoulders till you get this.
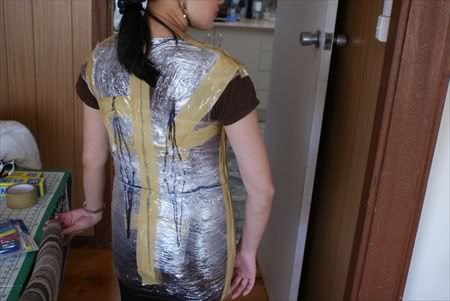
Mark the bust points, the centre front and back lines...
Ignore the diamond shape lines on the back-they are supposed to be straight lines from the shoulder blades down to about 5 inches below the hipline.
Mark the shoulder seams, the neckline, the side seams and the armhole. Tape all of the above.
Mark the darts from the bustpoints straight down to about 5 inches below the hipline.
I'm feeling like I'm in a funky disco costume. But I can't dance coz it's too tight.
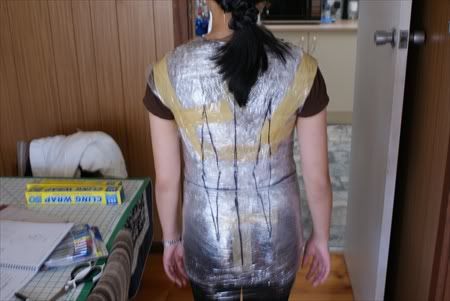
Now we're ready to get out of this ...thing...
Cut down the centre front line. Or the back. Up to you.
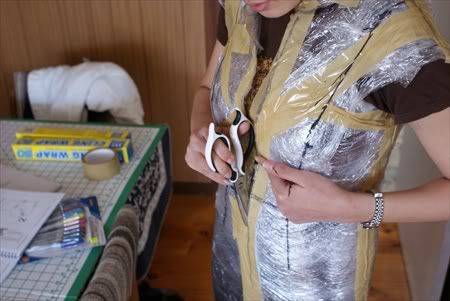
Cut down the centre front line-or the back centre line. Doesn't really matter.
And voila!
Meet Headless Mini Me!!!
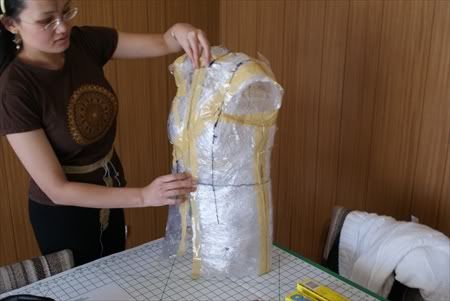
That's an exact replica of my body shape which I will cut up into flat pieces to make body fitting dress patterns.
Here is the thing sawn in half.
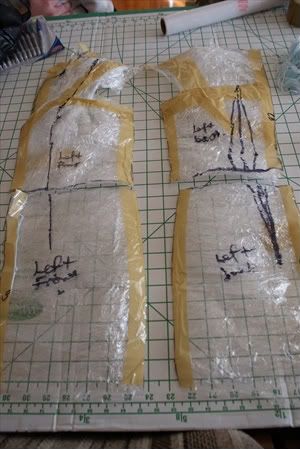
To make the patterns, the body wrap form must be cut into flat pieces. Cut along the waistline, the neck line, the shoulder and the side seams and you will get this.
These are the upper bodice and lower bodice pieces, left and right sides.
Now I will proceed to slash the darts-this makes the pieces flat. If there is still some 3-D shape to the wrap, you will need to add more darts, or deepen the dart slash to flattern it. We found that because there was so many layers of wrap, it was a little hard to ascertain that the pattern lay completely flat.

The darts that were drawn in as straightlines at the back and the front has to be slashed open till the pattern lies flat like the above picture. Then lay in on a wide piece of paper and trace around. This is what you'll get.
Voila! Your personal block!

Bear in mind that you can't make a dress with the pattern here-it has no seam allowance, no ease. You can't really move or breathe in this, unless it was a stretch material.
We actually made two wraps, and the one shown here is the first one. The first one had more layers on it, and therefore more stable and didn't warp afterwards. The second one we didn't use as many layers, so it's starting to come apart-the gladwrap wasn't as sticky as we'd thought it'd be. So if anyone attempts it, wrap at least 10 layers evenly all over the body.
I'm actually a little puzzled as to how the skirt block turned out. The front dart hardly opens, and the back dart looks odd. Also, I didn't expect the armhole to look so....angular. Hmm. Well I'll need to grade it up one size and make up a test garment to see how it'll look. Stay tuned!
the gladwrap ideal are just a brilliant ideal for home tailors for cost saving!!
ReplyDeletebut, it must have a partner to work this out?
Isn't it just great?! Yes, you'll have to have a partner to do it. Also, you'll need to add 1 inch at least to the bust line, the waist, and at leat 2 inches to the hip for you to sit down.
ReplyDelete[...] bit of stretch, but I wanted a form fitting dress, I decided it would be a good time to take my Gladwrap pattern and use that to make the pattern of this dress. Gladwrap [...]
ReplyDelete