My library got hold of the
Pattern Magic book for me last December. I poured and salivated all over it, especially the page on making a twist top. Since I've started patternmaking, I've been puzzling over how to actually draft a twist top from scratch-most patternmaking books don't go into that, and I've got no dummy to drape and experiment over. The
Pattern Magic
book drafts for wovens, not knits, so I imagine that drafting a twist top would need more precision than drafting for a knit, which would be more forgiving.
When I got hold of this book, I started to go through all the possibilities of drafting twist tops with the fabrics I had. I had in mind some polyester prints my mum brought over from Malaysia to play with.
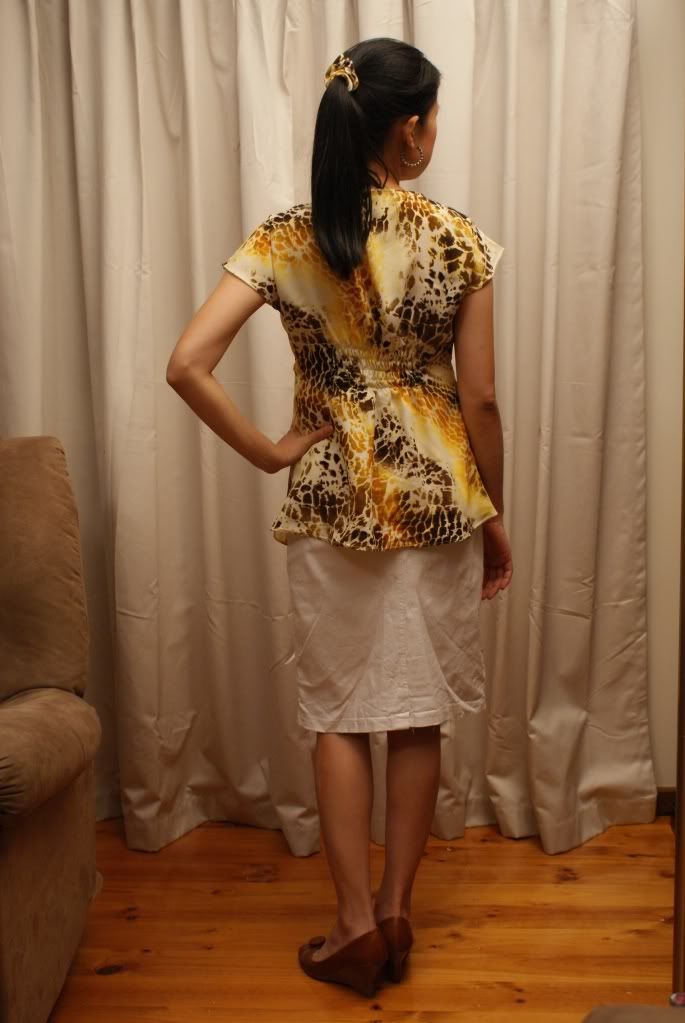
I wanted to draft a simple woven twist top with lots of drapey gathers on the belly for a maternity style. I wanted a loose fit, but with some waistline definition. However, the top had to be simple, no back seam, no closures, have a wide enough neckline for the head to go through etc.I decided on the design below-dropped sleeves with a one-piece back defined by an elasticised waist.. I've included the drafting process below.
I used my personal block to trace out the outline of the top.
I've discovered that cheap sew-in interfacing is great for tracing. That's what I used to trace over my personal block (on manila card).
I drew the outline of my top over the shoulder, centre front and side seams. Being a twist top, I drew in a v neckline. I also wanted a drop sleeve, so I extended the shoulder 1 cm up and 10-15cm out over the original armhole. I've included the darts as well.
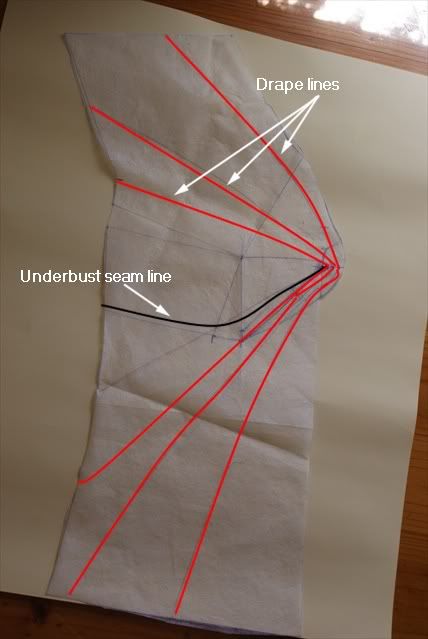
Where the red line forms a half circle at the centre front, that's where the twist occurs. Draw a small circle of 5cm in diameter if you want a tight twist, or draw a larger circle if you want a more relaxed twist.
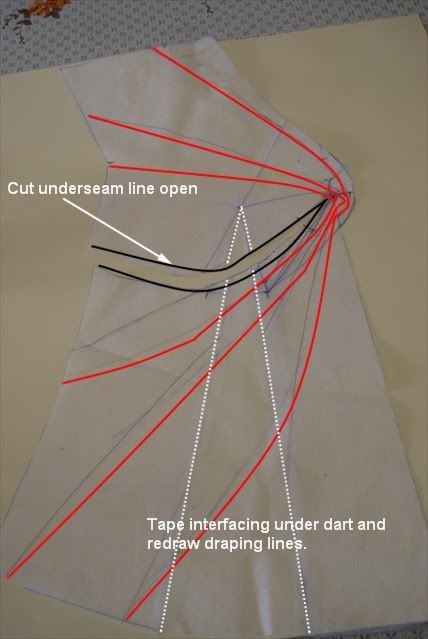
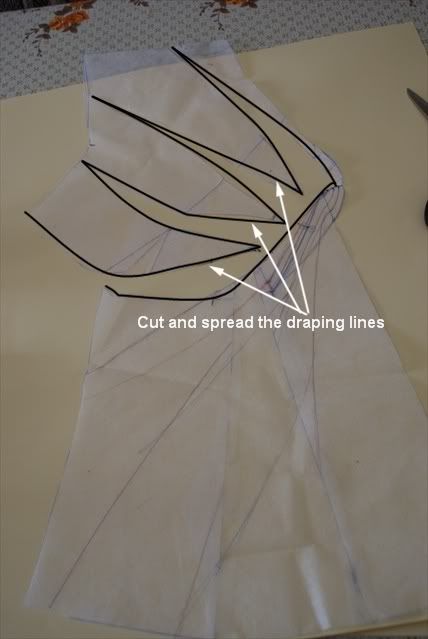
The red lines represent the draping folds. I learnt that the patterndrafter decides where the folds go when they draw the draping lines in. These lines must go through the half circle but must not touch each other, and should preferably by equidistant from each other. Later, you will see how cutting and spreading the draping lines will create excess fabric that will form beautiful folds when you form the twist.
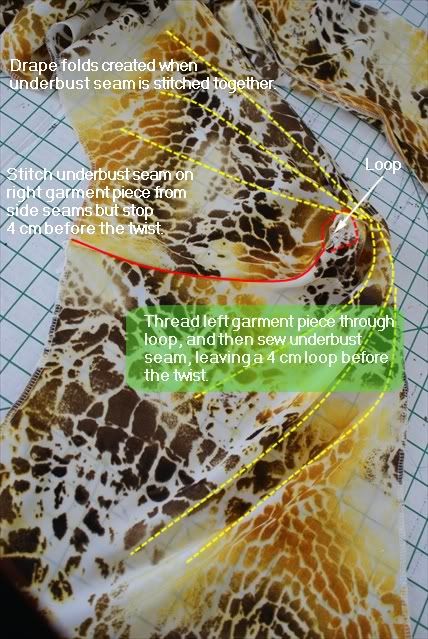
The underbust seam allows the twist to be formed by creating a loop. The loop is simply the unsewn part of the underbust seam, about 4cm long, at the centre front.
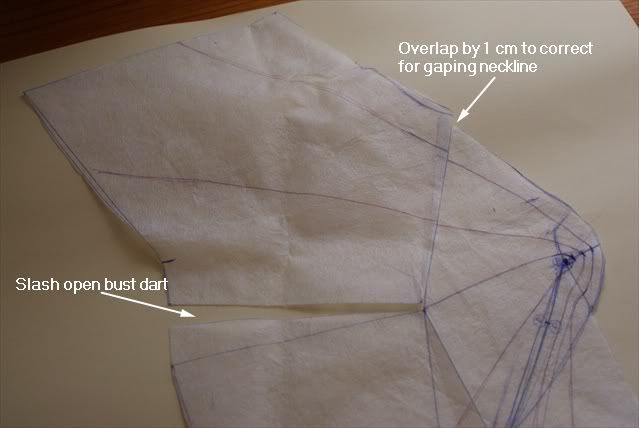
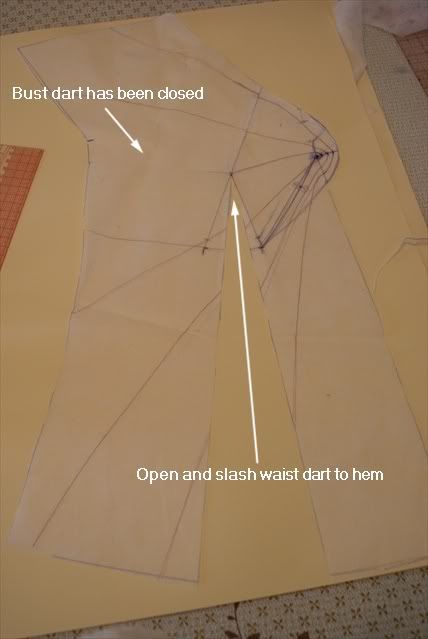
To correct a gaping neckline, slash from neckline to bust point and overlap by 1cm. In order to do this, you'll have to slash the bust dart open. This is be closed later.
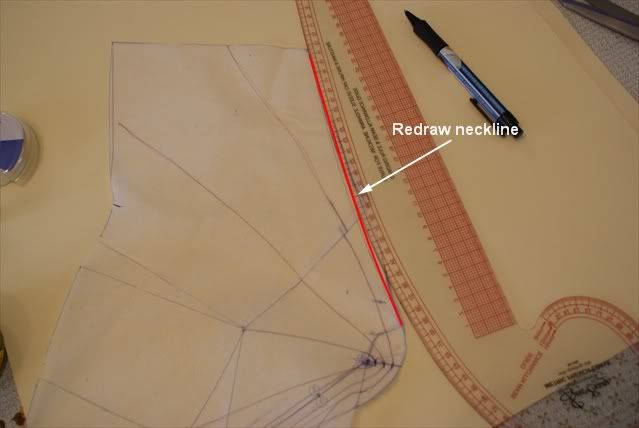
Redraw and smooth out the new neckline.
Slash from hem to bust point and open. Close bust dart.
Because this is a maternity top, I wanted a loose fit, so instead of shaping the darts below the bust, I left the darts open, and taped in more interfacing under the dart and drew the draping lines over it. Normally you would want to close that dart by joining each section of the continuing draping panels together to get a slimmer fit.
The underbust seam AND the draping lines are then cut open.
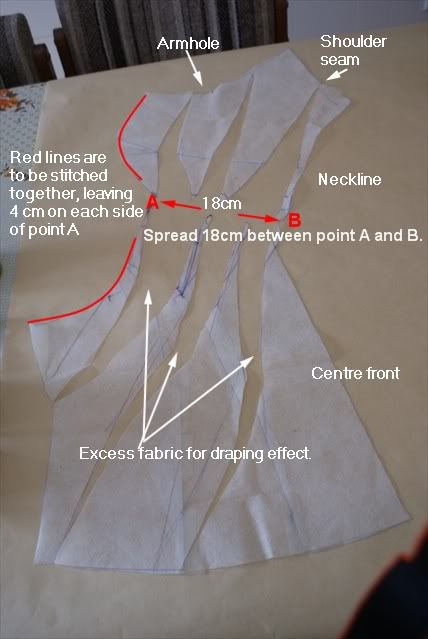
When all of the draping lines have been cut open, spread it so that point A and B are 18 apart. I labelled the underbust seam, shoulder, neckline and armhole so that I didn't get confused.
When slashing the draping lines, leave a little hinge at point A and B, or tape them together so that they are connected (but not overlapping).
Make a notch 4cm of either side of point A on the underbust seam. The seam will be sewn till that point only, creating an unsewn loop for which to thread the opposite garment piece through.
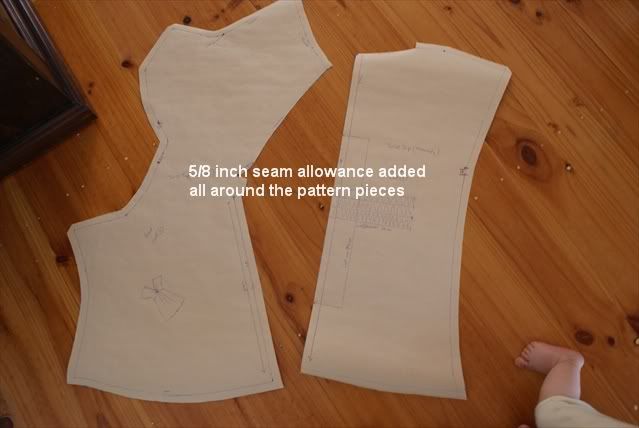
Here are the pattern pieces with 5/8 inch seam allowance added all around. Cut 2 of the front piece, and cut the back piece on a fold. (I didn't show the patterndrafting process for the back because it's a one piece, only needing to match the shoulder seam lenghts, and side seam lengths).
Isn't that a cute little foot?
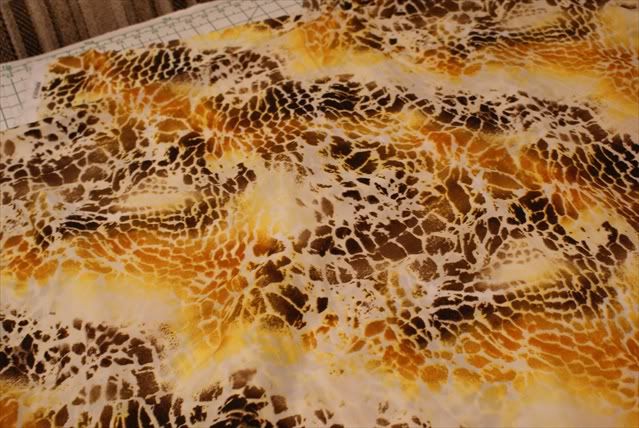
This is the fabric I used for the top. It's a polyester print, reminiscent of an animal print I think, but more wearable and cheery and less cougar-like I think.
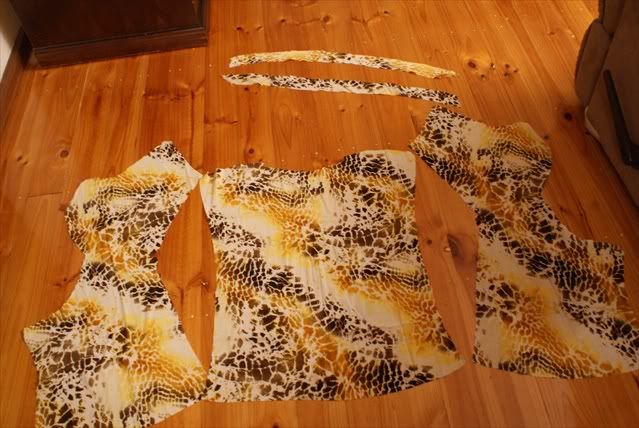
Here are my pattern pieces all cut out.
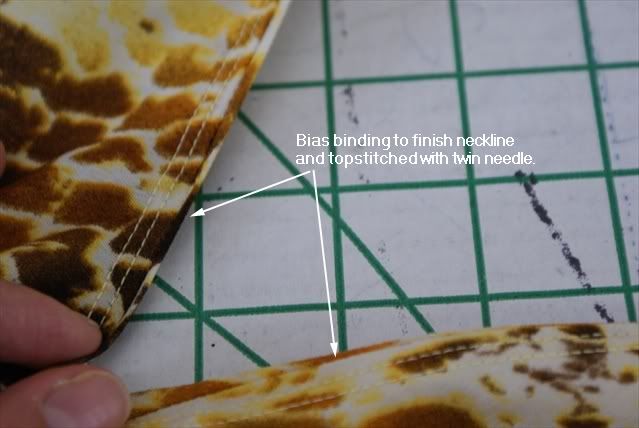
The 2 long thin pieces are bias cut for finishing the neckline. Normally with knit twist tops, the neckline has a self-facing , cut as one with the front garment piece. However, I didn't think it would work with a woven, so I decided to finish the neckline with a bias binding.
Below was my order of construction.
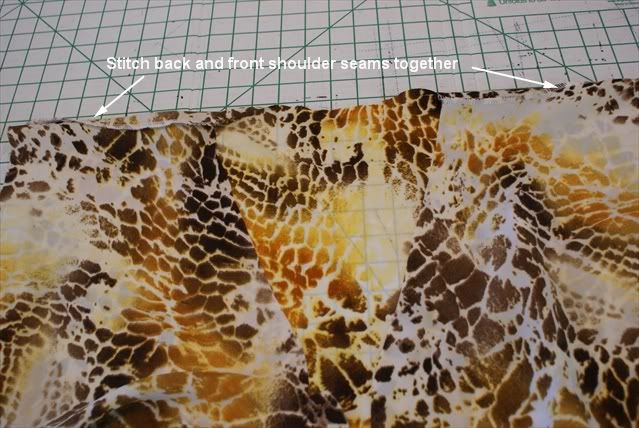
I stitched the shoulder seams first.
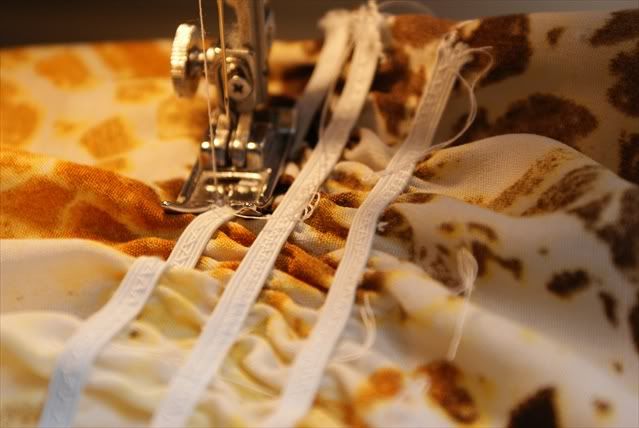
Then I sewed the elastic onto the back waist. Those hanging thread tails you see are tailor's tacks to mark the centre and ends of where the elastic should go. I cut the elastic 10 cm shorter than the width of my markings on the pattern piece. I pined the elastic at the ends and at the centre of the line markings, and stretched as I sewed. There were 5 lines of elastic to create a shirred backwaist.
To attach the bias binding, I pressed the bias strips in half, stretching as I pressed to make them more malleable. The raw edges were overlocked first, then matched with the raw edge of the neckline, with the bias binding on the right side of the fabric. It was then sewn all the way around the neckline. Before topstitching over it, I pressed it open, with the seam allowance facing towards the inside of the garment, and the bias binding peaking out on the right side of the fabric. It was then topstitched with a twin needle.
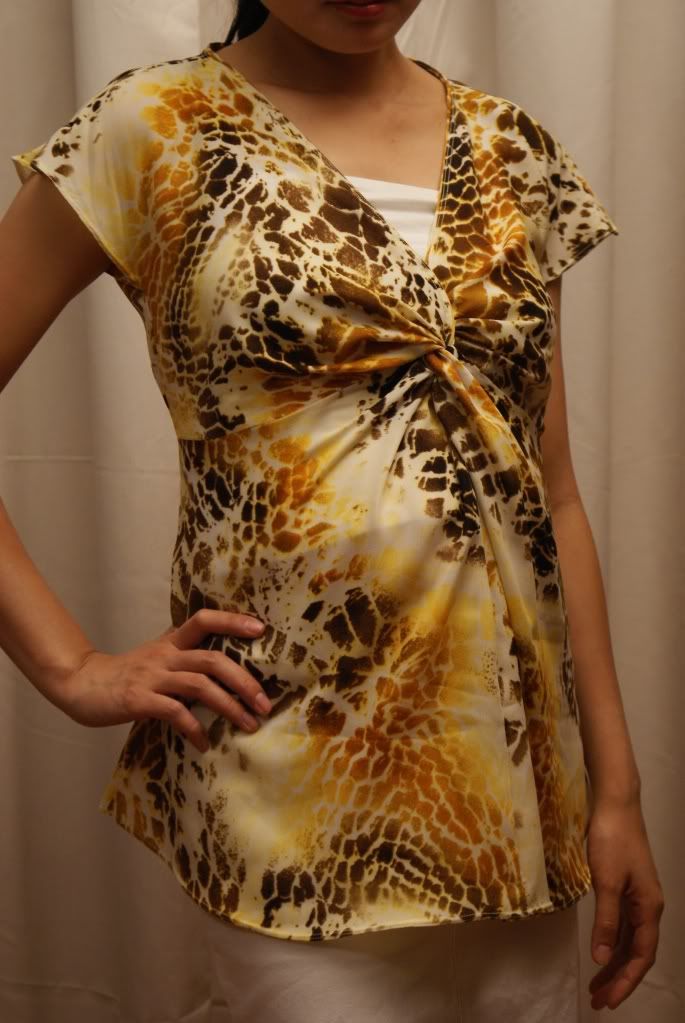
This was the most exciting part for me. I choose to sew the right garment piece first. The underbust seam is stitched to that notched point, 4 cm from point A, forming an unsewn loop. Here you can see all beautiful drapes and folds that is created when that seam is sewn. Then the left garment piece is threaded through the loop, and the underbust seam sewn to the notched point as well.
After this, all that is left is to sew the side seams, and hem the bottom. I finished the sleeves by simply overlocking and then sewing a narrow turned hem. And tada!!!!
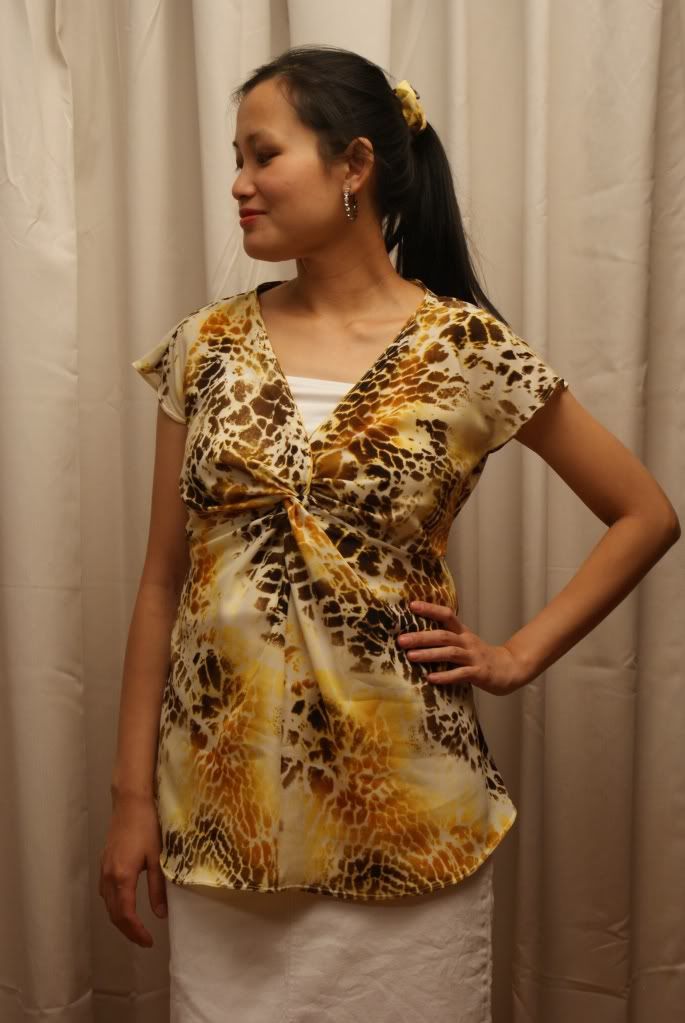
Here I am modeling it.
I have to admit though, that I resorted to tacking the twist so that it stayed in place, because the underside of the bias binding showed through the loop in the twist. Also, it was a little too roomy, so I took in the sides. The shirred back waist helped define the waistline better despite the absence of darts in the front for shaping purposes.
All in all, I'm quite happy with this top, and will probably make more.
