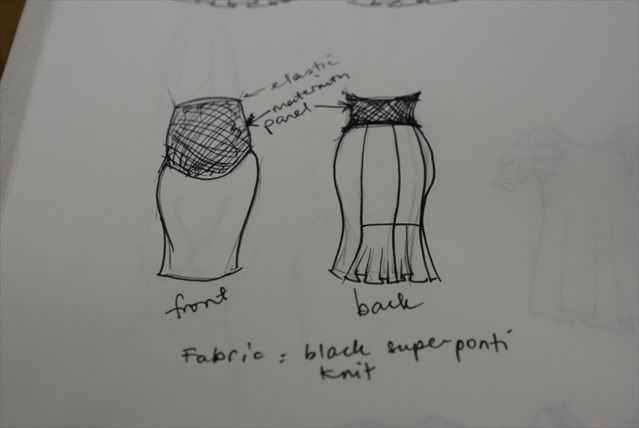
I already knew what fabric I wanted-which was a ponte knit from Spotlight, so this pattern is drafted like a woven except for the maternity panels. I wanted a tailored look and a maternity panel when went all the way over the belly to the underbust. Can't stand maternity skirts you get from stores because they must have been designed by somebody who was never pregnant before! The waistband, although elastic, starts at the middle of the belly, or under, but very seldom cover the belly, which either makes you look fat, or cuts off your circulation when it starts to cut into the underbelly.
By the way, ponte knits are the bees' knees! I went to Spotlight the first time and got a super ponte, which I over paid for (see my last post), and the second time I went there they had a 30% off already reduced fabric sale! And there were red, brown, fawn, ivory and blue-black ponte-de-roma knits!!! I bought 1 metre of all the colours they had available at about $5.60 per metre. I love ponte knits now because they feel quite substantial, especially the super ponte, which was very stable and quite thick, and they sew like a dream.
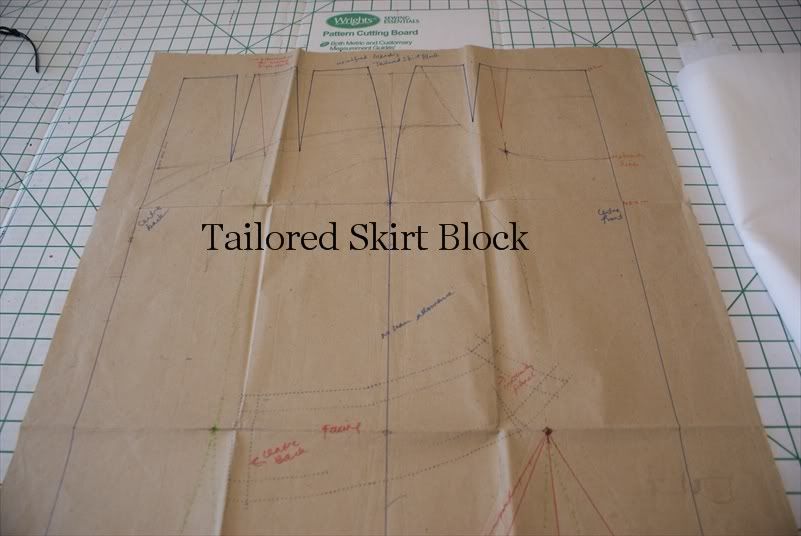
Anyway, I started with a tailored skirt block. Make your own personal sloper/block from Gladwrap (see here), or use this Burdastyle Skirt Draft Tutorial to make the block. I used my pre-pregnancy sized block to draft this skirt.
First, draw in the stylines according to the sketch. (I've drawn the maternity parts in red coz that's the interesting part!) I've also added notches (in red) to guide me when the pieces are cut apart later. Be sure to alway transfer the notches whenever the pieces are cut away and seam allowances added to it-it makes life so much easier!
Cut the panels apart. Now comes the best parts of pattern drafting.

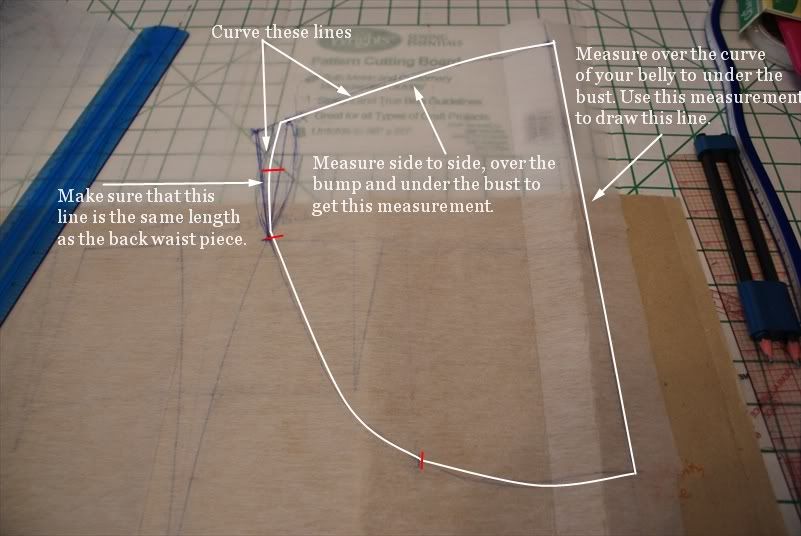
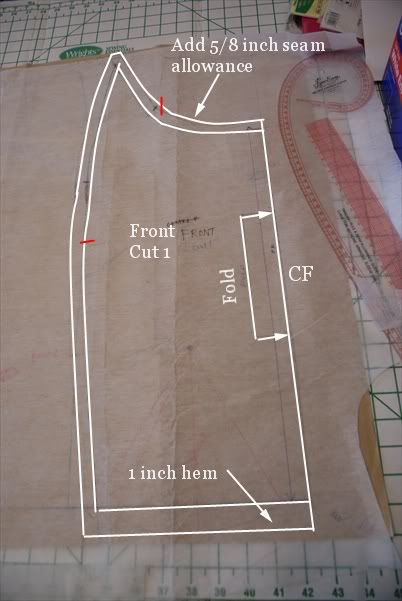
Estimate where the curve of the bump started (below the waistline) and draw it into the block. Then measure over the belly from the underbust to the pubic bone, use this measurement to draw a straight line on the centre front upwards (in red).
Also decide how wide the back waist band is going to be, mine was about 4 inches wide, and draw a straight line 4 inches up from the centre back line. The side seams should curve in, and match lengthwise to the maternity panel.
Draw a curved side seam 4 inches wide for the maternity panel, as well as a curved line from centre front to side seam.
Add 1cm allowance for the elastic casing to the front maternity panel and the back waist. The back waist can be cut on the fold if you have enough material. I drafted it to be cut on the fold, but found later that I had to omit the seam allowance on the centre back and cut 2 pieces to be joined because I didn't have enough material.
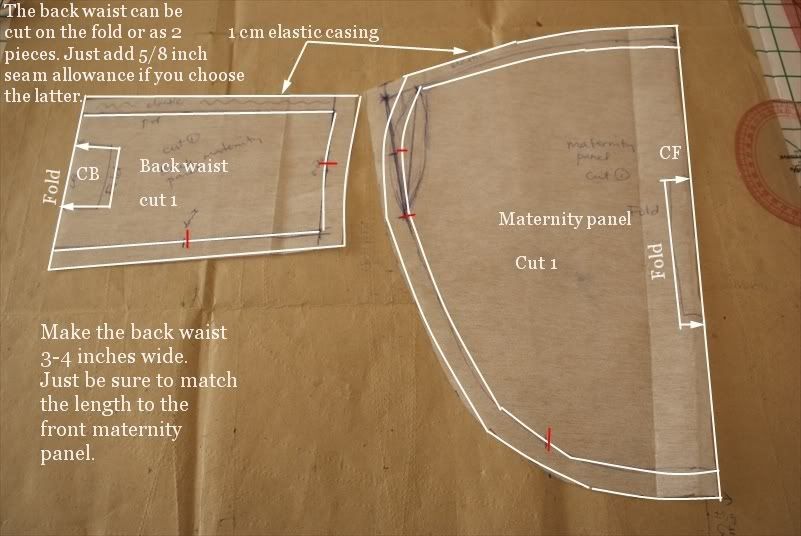
Be mindful that the back waist band must equal the length of the centre back panel and the back side panel, minus the dart width.
Take the front centre panel and add hem and seam allowances and transfer notches.
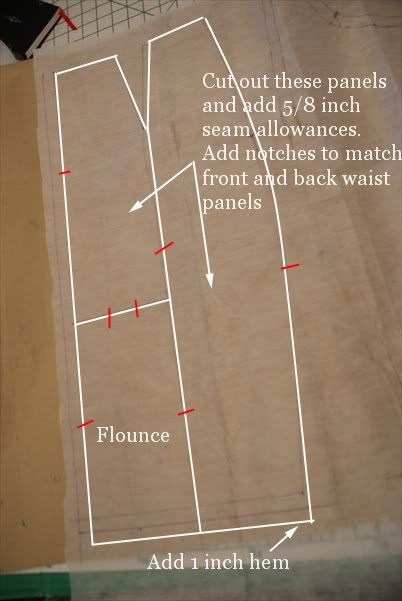
Do the same for the centre back and back side panels.
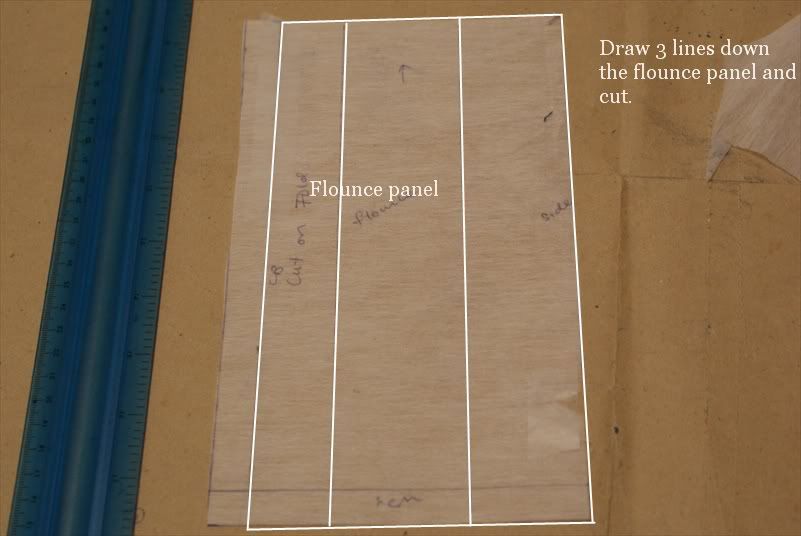
To make the flounce, cut out the flounce and divide into three pieces.
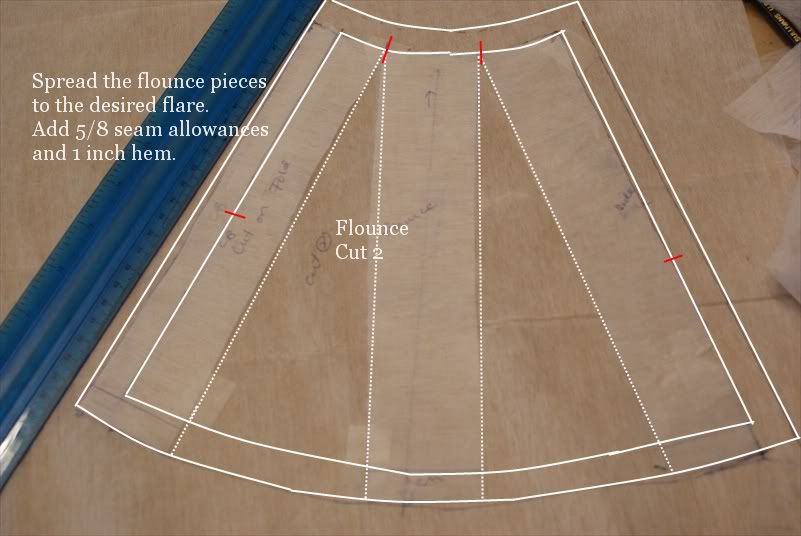
Spread the flounce to the desired flare. Add seam allowances and notches, as well as an 1 inch hem.
And that's all the drafting done! All we need to do is to lay it out, cut and mark the pieces.
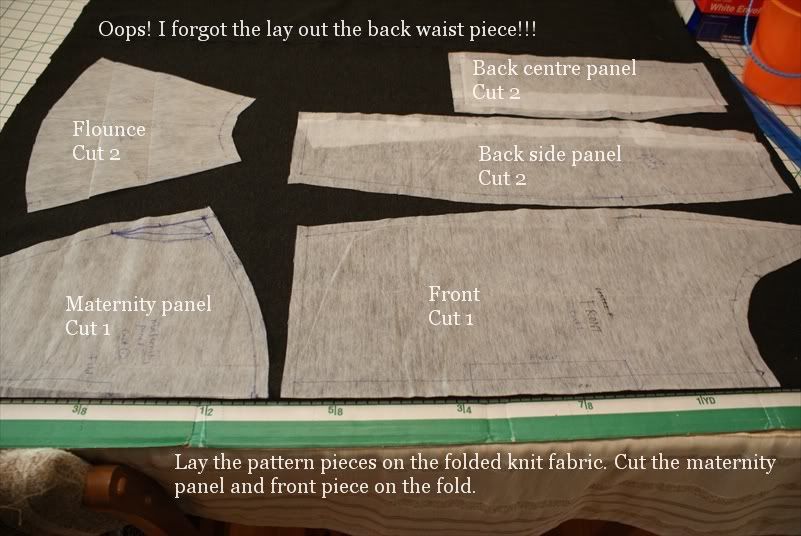
Ponte knits are a breeze to cut because they are so stable, just be sure that they are on grain.
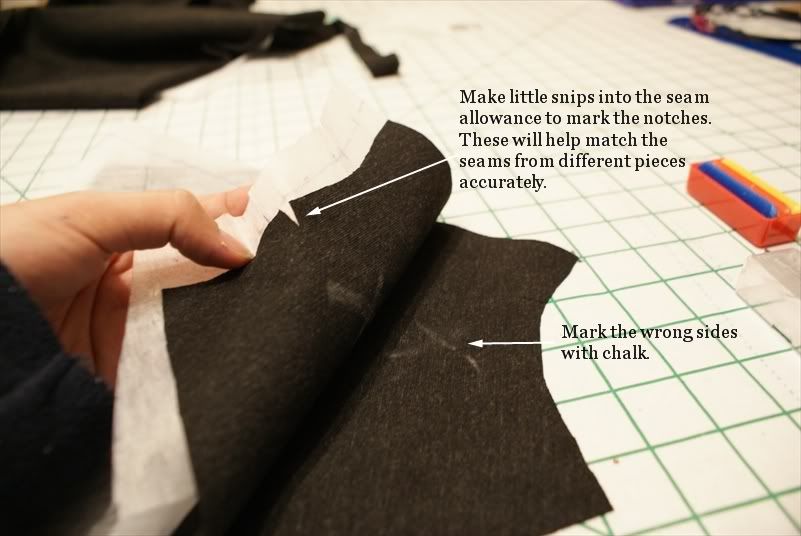
Remember those little notches? Make little snips in the seam allowances to mark each notch. It helps you match seamlines accurately. Also, ponte knits are double faced, which means that you won't be able to tell which is front or back. Choose a wrong side and chalk it with "X".
Put all the cut fabric pieces together and roll it up! We'll start the sewing journey tomorow!
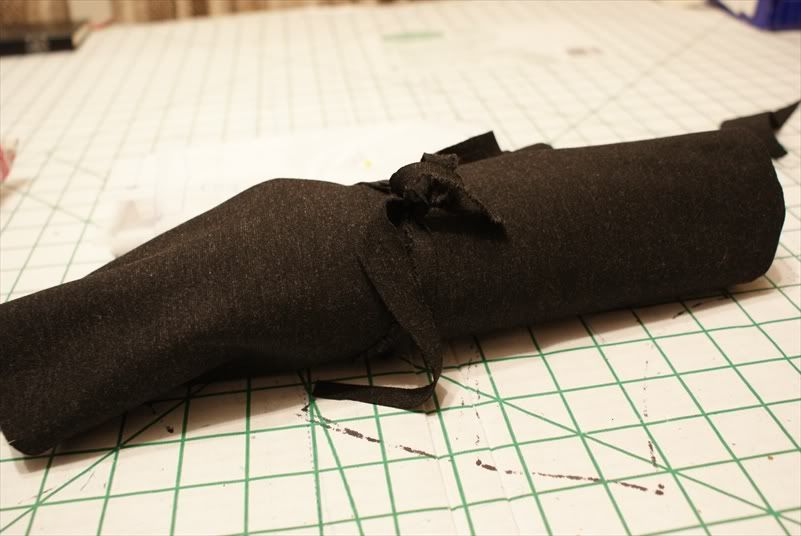
I love the little tied-up roll. So neat!!! And so full of potential!
Awesome post! Thanks for sharing this tutorial--you are so generous.
ReplyDelete