Saturday, February 5, 2011

One Dollar Sewing Books

I woke up to a beautiful morning today-beautiful weather in the low twenties, a nice break from the 36-43 degree weather we've had the past week. So I decided to visit a park in one of the eastern suburbs with William. While I was having a look around the place, I noticed a secondhand bookshop in the corner and decided to check it out.

At the door, they had a one dollar book trolley, which to my amazement, had at least 8 books just on sewing and patternmaking. Most secondhand stores and opshops don't carry anything about sewing worth buying, but these were really good, hard to find secondhand books in mint condition. Needless to say, I snapped them all up, and the nice lady brought out some more she had at the back. My eyes nearly glazed over with the stack of books I had.

See, every now and then, I'll go on Amazon and read reviews of sewing and patternmaking books, and I would make a list of all the books I'd like to get my hands on. Once I want to learn about something, I'd get every piece of information available about it, and still wouldn't be satisfied. It's because I love books, I love reading, and now I'm addicted to sewing and patternmaking. Much like people collect recipe books, I collect sewing books. When the TAFE or WEA course book comes in the mail (FYI, these are short courses and community learning programs for adults), I'd read the fashion section to see what was being offered at the time. They'd have dressmaking, alterations, bra-making, corset-making, patternmaking classes etc. I'd love to attend, but being a mum with a very attached little man, it's a bit hard.

Aside from that, I learn very well just from books-I taught myself how to knit, sew, draft and cut patterns for myself just from books. It doesn't work for all people, I think most people would benefit immensely from having an instructor to teach hands-on. But visual learners could probably manage without if they need to.

I also tell myself (and Wyld Man) that for the price you'd pay to attend these courses, you can buy loads of books and materials and learn to do it yourself. So my love affair with sewing-related books continue.

Anyways, these are the titles I got this morning.

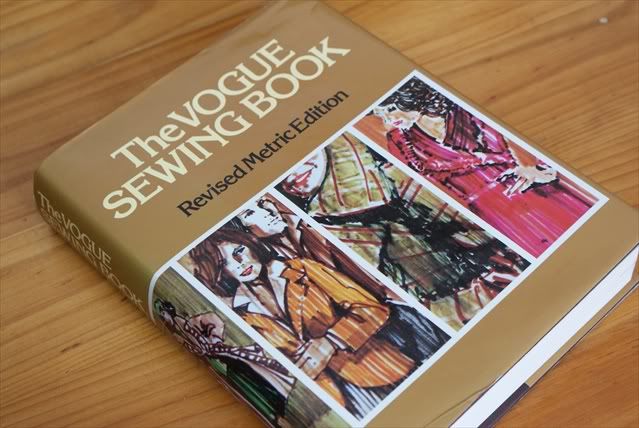
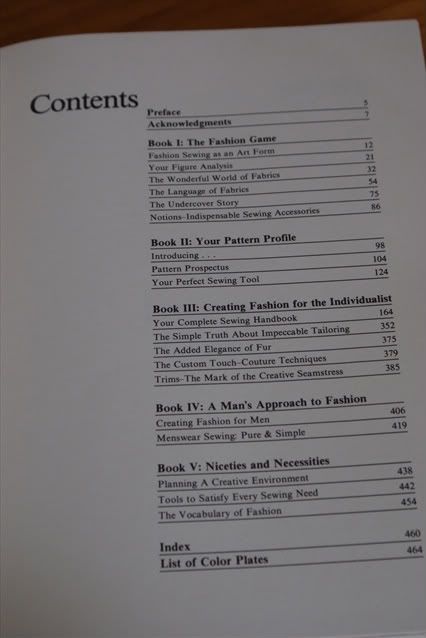
1. The Vogue Sewing Book: Revised Metric Edition. Pub.1978.
This is a hefty book at 464 pages thick. It was also the most expensive of the lot I bought at 15 dollars. But anything Vogue puts out is good. This book covers more than just the usual basics. It has a chapter on sewing menswear and fitting for men, tailoring, and even talks about using fur and feathers for embellishments. There is a page on how to build a cutting table, as well as a big chapter on common fitting problems. I've added the Contents page below.

Some pages from the book are below.

 
2. Metric Pattern Cutting by Winifred Aldrich, 3rd Edition. Pub 1996.

This one was a real coup. I couldn't believe that they were selling this for a dollar. My Metric Pattern Cutting for Women's WearI bought at Dymocks for AUD76.95. I've now got the whole series, including the ones on menswear (Metric Pattern Cutting for Menswear)and childrenswear(Metric Pattern Cutting for Children's Wear and Babywear).

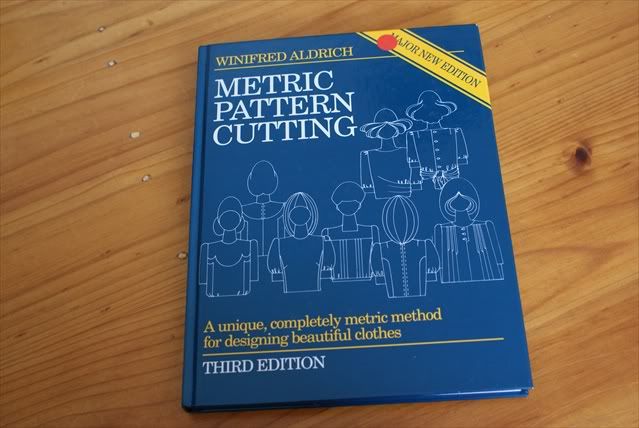
I really love this whole series by Aldrich. Her books are surprisingly thin, but very dense with information. I learnt most of what I know about patternmaking from her book on womenswear.

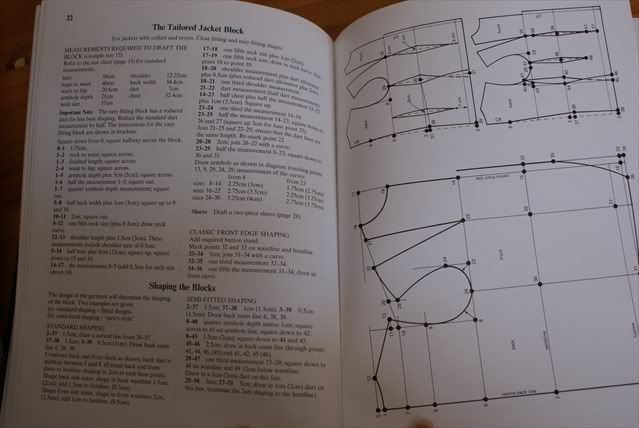
Here is an inside look at her book.
As good as her book is though, I've found though that she drafts with a lot of ease, even with the close fitting block. And the bust apex follows a set formulae instead of your personal measurements. This can point your dart somewhere else rather than your actual bust point. But if you have some knowledge of pattern drafting, it is easily corrected. The strength of this book lies in the extensive illustrations. Her explanations are very brief, but to the point. No wasted words here.

3. Make Your Own Patterns: An Easy Step-By-Step Guide to Making Over 60 Patterns by Rene Bergh.

 Time and time again I've seen this book on Amazon or Alibris and read good reviews about it. So I was really glad to find this book, especially one in such excellent condition. It is 128 pages, with glossy full colour illustrations. It covers how to make your own bodice, sleeve, skirt and pants block, as well as how to draft different necklines, sleeves, and skirts. Looks very promising indeed.

`
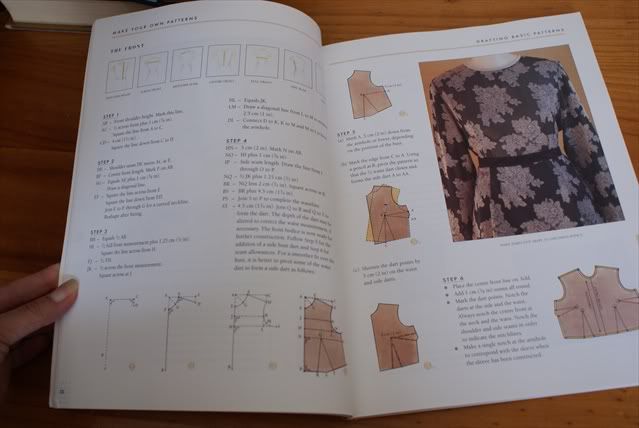
Above is the page on the bodice block draft.

Aren't the illustrations pretty? This is the first pattern cutting book I've seen in colour.


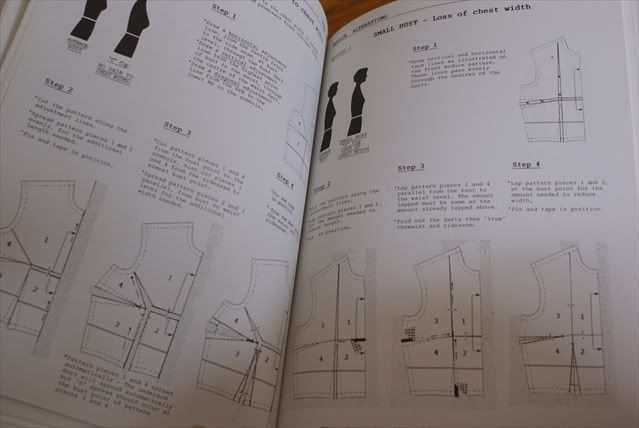
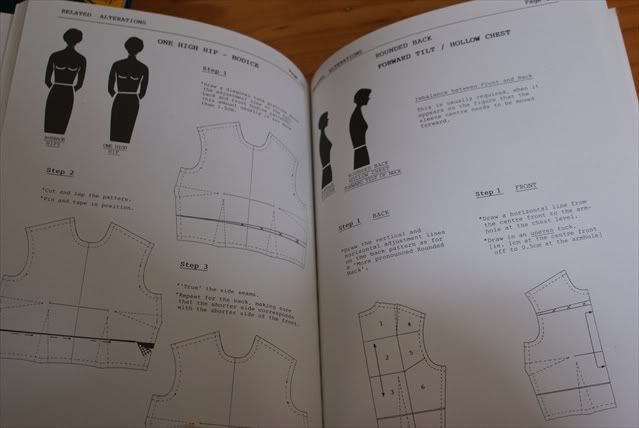
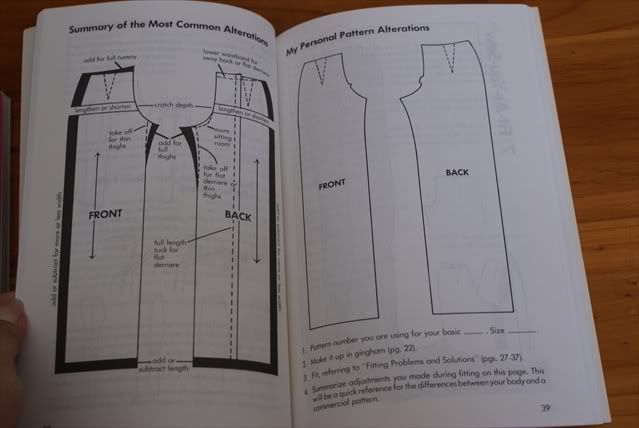
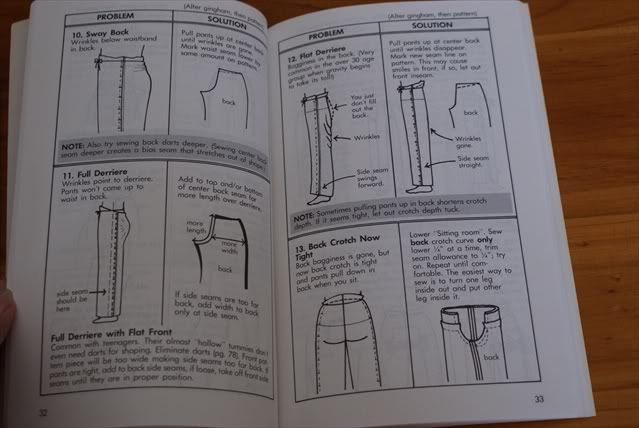
4. Pattern Alterations by Pat Fernon. Pub. 1990 by TAFE Publications


This is a fairly comprehensive book on fitting problems. It does not teach you how to draft, only to fit commercial patterns. There is a companion book called Figure Analysis, but it seems quite good on its own. Being a TAFE publication, I reckon it's quite rare, and you can't really get it anywhere else.

It covers some unusual alterations such as 'prominent shoulder blades on a narrow back' and a 'bottle neck' (what in the world is that?!!)

My next finds were:

5. Singer Sewing For the Home Pub 1995, 128pp. This is a good basic book on home dec. I don't like project based home dec books-but this one guides you through home dec techniques such as how to measure curtains (I recently tried to measure my windows to make curtains, and believe me, I got confused about how much fabric I needed to the pleats!), how to line curtains, hem tablecloths and apply mitred bound corners to place mats.

6. Singer Sewing Essentials Pub 1984, 128pp. A very basic book to have, and I daresay I'm familiar with most basic techniques, but I couldn't pass up the chance to start collecting the Singer books. It has tonnes of gorgeous pictures instead of illustrations.

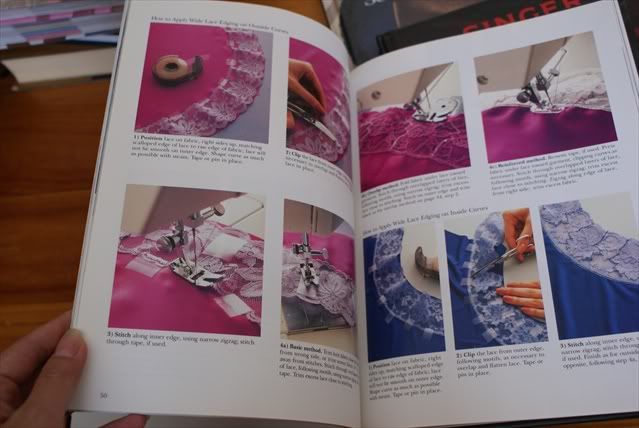
7. Singer Sewing Lingerie Pub 1995, 128pp.

I was really happy to get the three from the same series. The Singer Sewing Reference Library books are packed with step by step photos over a broad range of subjects. Of the three books, my favourite was the Sewing Lingerie book, because there are so few on the market. This book also has glowing reviews on Amazon.
It covers lingerie fabrics, lace insertion and application techniques, how to make slips and camisoles, loungewear and sleepwear. However, it's a pity it does not cover bra-making.

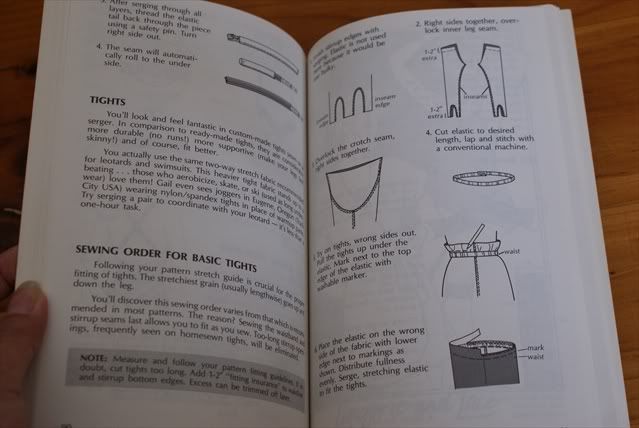
8. Sewing With Sergers: The Complete Handbook For Overlock Sewing by Gail Brown and Pati Palmer. Pub 1990. 128pp.
 A really good book on sergers. However, being black and white only, it's a bit boring.

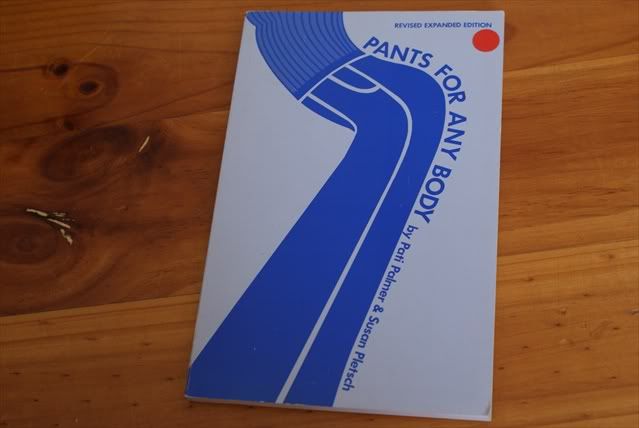
9. Pants For Any Body (Revised Expanded Edition) by Pati Palmer and Susan Pletch
I haven't sewn any pants yet, but having read the multitude of problems sewers face when they try to sew and fit pants, I thought it would be a good idea to have a pants book around. However, I think the newer version called Pants for Real People: Fit and Sew for Any Body (Sewing for Real People series) would probably be better, as it is in full colour instead of black and white illustrations.


  A good book to get.

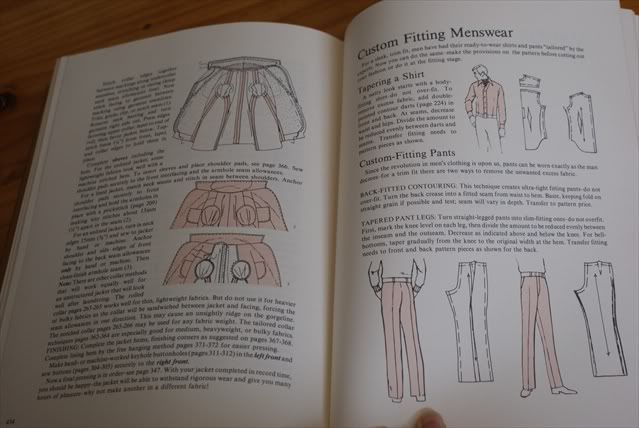
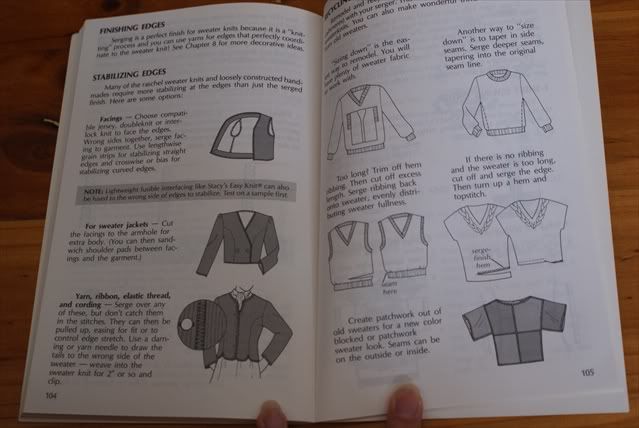
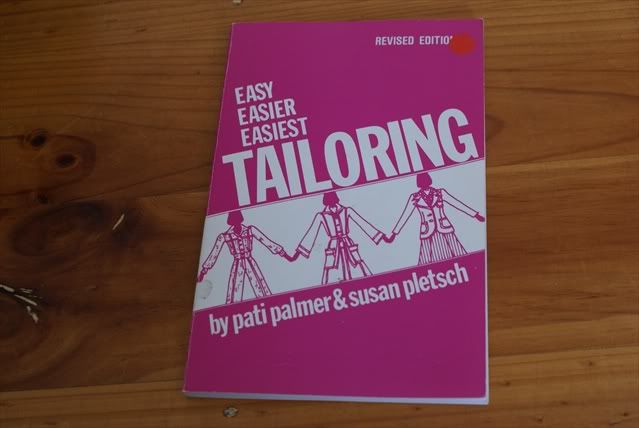
10. Easy, Easier, Easiest Tailoring (Revised Edition) by Pati Palmer and Susan Pletch
This book is about tailoring shortcuts. It's not about custom tailoring. It's an ok book for an 8-hour-jacket, but I'd probably refer to the newer edition called Jackets for Real People: Tailoring Made Easy (Sewing for Real People series). Again, black and white illustrations.

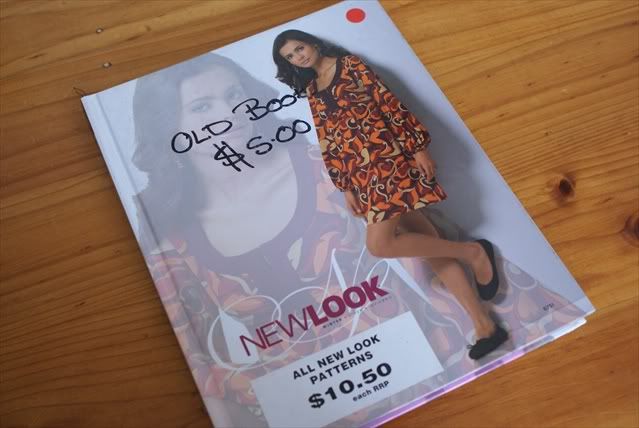
Lastbut not least, I got 2 pattern catalogues, a Simplicy Spring and New Look Winter.


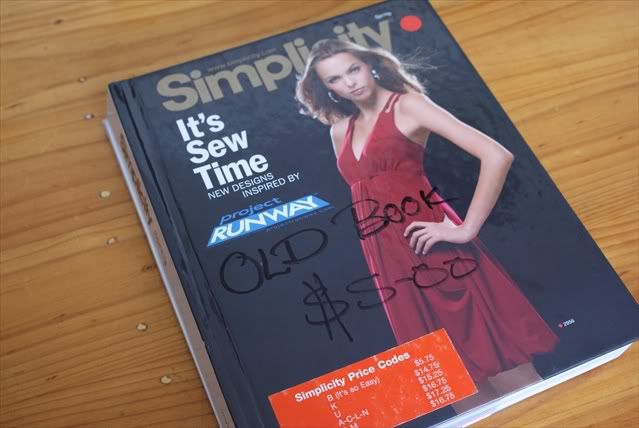
Why would anyone buy a pattern catalogue? To get drafting ideas on different blouses, dresses, necklines, sleeves etc; fabric suggestions for certains looks and patterns as well as an idea of the yardage needed for a design. Technical drawings are what I like about pattern catalogues, because when you draft from scratch, a coat for example, you need some reference as to how wide the collar or pockets should be. The style lines in the technical drawings are very helpful. When I see an interesting and unusual pattern, I like to turn it over in my head like a puzzle and figure out how it was drafted.

Everything I bought was a dollar each except for the Vogue Sewing Book and the Singer books (which were four dollars each). So I spent 35 dollars on 12 books in all.

This made my day!

Tuesday, February 1, 2011

Three Maternity Summer Tops

It's been a super hot week. It was 42 degrees Celsius today, about the same yesterday, but will go down to 33 degrees tomorrow. I've been itching to sew, and thought it would be a good time to make some summer tops to go over the burgeorning bump.

I ran through some designs in my head, and remembered this Vogue Patterns Anna Sui V2850 top which I fell in love with some time ago and decided that it would be perfect converted into a maternity top.


I love the version with the neck flounce. I had a black, loose weave, chiffon-like polyester material in my stash that I bought from Spotlight just for it.

As usual, I drafted my own pattern. Unfortunately, I didn't take any drafting or construction pictures (it was too hot and I was lazy...) The pattern had to be quick and easy, with lots of room for the baby bump. I didn't want any darts or closures, so it had to fit over my head easily, but not gape at the neckline. I didn't really follow the technical stylelines of the Vogue pattern. It was primarily the neck flounce that I wanted to copy.

When I got to work with the fabric, I decided to take it slow, and handsew. It was extremely unstable, stretching everywhere because of its loose weave. The fabric had to be underlined with something, but I didn't have anything suitable, since the fabric had a bit of stretch. The only thing I had on hand was a red tricot, so I used that. I quite like the effect of the black on the red. The tricot is a bit shiny, but is toned down under the black chiffon, so it looks rather sneakingly snazzy.

It was a good thing I decided to handsew the tricot underlining to the chiffon. It stabilised it, so I was able to eliminate facings on the neckline and armhole. After all the seams were handsewn, I overlocked the edges with a 4-thread overlock. And neck flounce and hemlines are roll hemmed.


This top came together very quickly because there was no darts, no facings, no closures. I'm really pleased with this top. Here's a couple more views.


I like it with or without the belt. And it looks quite like the Vogue one I think.

Because this one came so easily together, I decided to use up some other fabric in my stash on this same patter, but with different sleeves. My mum had brought over some nice summery fabrics from Malaysia, and I thought they'd be perfect.

I sketched some designs with the same bodice pattern, but with different sleeves, and decided to cut out two garments at once to save time. I made one with a circular sleeve flounce, and one with a triple cap sleeve.


This one is a very light polyester print with a raised texture, similar to a seersucker. I love how the sleeves came out.


The sleeve flounce was roll-hemmed, and the neckline bias-bound.

I used the Banded V-Neck on Woven Fabric technique described in Lynda Maynard's The Dressmaker's Handbook of Couture Sewing Techniques. I've fallen in love with bias bound finishes. I used to think that it was really hard to cut bias strips out without a rotary cutter and mat, but I actually do them quite well just with scissors. And I also used to think that it was fiddly to bind an opening, compared to sewing in a facing, but I have to say that bias bound finishes are so much neater than a facing, doesn't flip up, and they just look so good. I've been using them on everything lately.

This is the third top I made.


I really like this one too. I've been wanting to try out the triple sleeve effect on something. Looks pretty cute. Without the belt, it's quite casual, but I love both looks. Again, I used self-bias binding on the neckline, and the the lower armhole.


Three tops in a week is my best sewing record to date. I love quick projects! (Ones that turn out all right.)

I'm probably going to make more maternity tops with this pattern, since it's so easy, and quite the TNT (tried and true) pattern. I'll just have to think up some different neckline and sleeve treatments to make them all distinctive.

I'm not sure which is my favourite top-Wyld Man can't decide either. Which one do you like best?

Incidentally, I didn't finished roll-hemming my black top till after the two others were done. When I did the neck flounce, my overlocker needle broke, and now my overlocker won't sew properly anymore. Boohoo....I'll have to send it away for a lookover. Hopelfully that won't take too long and I can get some more tops done soon!


Monday, January 17, 2011

Dining Room Makeover: Champagne Taste, Beer Budget

We first got the keys to our house about a month before we got married, which was almost 2 years ago. The  walls and ceilings were looking a bit dingy, so we decided that a lick of paint was in order. We managed to paint the lounge, bedrooms and hallways in the month before the wedding, with some help from family and friends.

However, the room that was to be the dining room was covered in awful 70's fake wood panelling, which we thought we'd rip out one day and redo with new gyp-rock. So we left it as it was, because we didn't have time nor money then to have it fixed. The said room looked really seedy, with a bare hanging bulb, and a huge carpet-covered pinboard which hid two large holes that once housed an air-con and a heater. The wall panelling was bowing out in places and ready peel off the wall because the glue had perished. The ceilings had a yellowed, aged look which made us suspect that they were smokers and all that smoke had nowhere to go but up. So, we hated the room but bore with it.

Then last weekend, when Wyld Man was still on his last week of holidays, we decided (well...Wyld Man maintains that I decided and roped him in to do it)  that it was time to do something about the darn room. And we had a deadline. Not only was that the last week of holidays, we were having our housed blessed by our priest on the coming Saturday (yesterday), and he was staying for dinner. So that clinched it. We had a week to do something about it, and we had to have it done by Saturday.

Now, I've always maintained that the fake wood panelling could be painted over for a quick and cheap fix, instead of having everything ripped out and replastered.  But Wyld Man had to be persuaded-he was of the old school and didn't believe that it could be painted until I showed him some pictures online of rooms which had the same thing done with great results. He did agree in the end-phew! Now I had to come up with a concept. I had a rough idea of what I wanted, but we couldn't decide nor agree on colour. So we proceeded to prep the walls, but without a clear idea of what colour scheme to go with.But  I did know that I wanted red curtains, and a certain mirror from Ikea.

The first thing we did was to get rid of the old pinboard-(the very one which I've using to showcase some of my earlier creations-you can go back to earlier posts to have a look). Wyld Man unscrewed it off the wall, and we discovered two large ugly holes, and a wood panel missing. Which was a big inconvenience. Here it is in all it's glory.


I don't have a proper before picture, but you get the idea from here.

Wyld Man decided to get a BIG, SCARY circular saw and use it to cut  a couple of square panels to fit over the holes, and to cover the wood panel. I love a man with power tools. *sigh* There's something primal about it.


That's one problem covered.But I should have taken pictures of Wyld Man with his circular saw. Darn.

Because one wall had the panelling bowing out rather severely, Wyld Man thought it would help if he nailed in a waist height decorative moulding, which would also give a colour break between the walls, giving us more options. This wasn't in the plan in the beginning-but we thought it was a good idea.

The next picture shows both holes covered, and all the nail holes, imperfections, scratches and what-nots puttied up and sanded down by yours truly. You can see the moulding along the walls and the ceiling.


Next up, the walls had to be washed once with Sugar Soap and then that washed away with water. Sugar soap is powerful stuff-it strips off 20-year-old adhesive marks on the walls, dirt, grime and grease with not much elbow grease needed.I also taped around all the edges and over frames and skirting boards with masking tape and newspaper.

Then we had to prime the walls with a special primer-one that would adhere to the vinylly wood panelling without peeling off. The hardware store recommended Zinsser Primer, which you can use on anything- laminates, plastics, even glass. However, we neglected to prime the ceiling, which in hindsight we should have, because it gave us lots of problems.

We started ripping things down on Monday, but we had lots of false starts and delays, lots of prep work, getting hand and power tools, so only got to priming on Thursday, by which time we were freaking out that we weren't able to get it finished in time for Saturday. We'd left the colour decision till Friday, because we couldn't agree on a colour. I wanted something like a muted-beige-brown-green, which Wyld Man said doesn't exist. And I wasn't hot on his colour choice either. In the end, we settled on a compromise-Dulux Stonecrop, which is a sort of khaki brown.

On Friday morning, I started to do the cornices while Wyld Man went to get the Stonecrop paint. For the rest of the paintwork,  we decided to use some leftover paint from when we first bought the house, Wattyl's Ceiling White on the ceiling, and Ivory Vapour on the lower walls. However, we ran out of ceiling white because I had to do the cornices 4 times before we were satisfied, by which time there wasn't much left for the ceiling, which needed another 2 coats at least. And we realised that if that was the case, we'd have to get another colour for the lower walls, because the Ivory Vapour we had definitely wasn't enough. That meant another colour run to the hardware store, and I made a quick decision from the same series that Stonecrop came in, Shell White for the lower walls, and Fair Bianca Half for the ceiling. And yes, we had to do the ceiling and cornices one more time.


When I came back from getting more paint, Wyld Man had edged in the Stonecrop which you can see above. And. I. Was. Not. Very. Pleased. With. It. It was a very odd colour, I thought. But it was too late now go back. I don't think they take returns on tinted paint cans. We forged ahead, hoping for the best.

We worked and worked into the night-at 2 am, we had finished painting. Finished! Finally!


On Saturday morning, I went to Spotlight to get my curtains, and Wyld Man put up the mirror and the light fittings.

Drumroll please....


Another view.


The colour didn't come up too bad after all! It was almost what I wanted, and it went beautifully with my red curtains and gold Ikea mirror (Levanger).

All in all, it costed us around $600 for the makeover, and that's including the mirror and the curtains. Pretty good effort I'd say. And Wyld Man got to keep his power tools too!

I'm in love with my dining room. Now, if only we can get the rest of the house to match it....

So we had Father over for the blessing and dinner. Here are some photos of the house blessing.


Father went around to all the rooms and used Epiphany water to draw a cross on all the windows whilst saying the prayers.


And on the entrance he wrote with blessed chalk the words "20+C+M+B+11", which is the current year and the names of the three Magi:  Caspar, Melchior and Balthazar. It also has a double meaning in latin, with C+M+B standing for  "Christus mansionem benedicat", and in English " May Christ Bless this house". The blessing can be done every year, hence the incribing of the current year on the doorway, and unlike most blessings, can be performed in the absence of a priest by the father of the house. More on the Epiphany blessing here.

Well, Wyld Man is back to work tomorow, so back to the normal grind it is for the both of us. Hope you had good holidays too!